Very Easy Veneering


Some projects beg for the eye-catching grain pattern of a highly figured, book-matched panel. But it can be tough opening your wallet to pay for an exotic piece of lumber, and then gathering the courage to resaw and plane it. Veneer gives you that breathtaking look without breaking the bank—and applying it is easier than you might think.
Deal with pressing matters
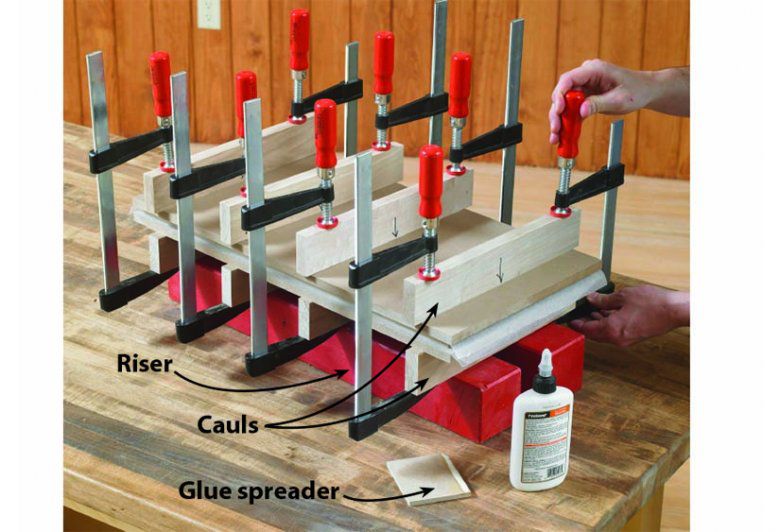
Start by gathering waxed paper and making platens (stiff, flat 3⁄4 "-or-thicker MDF, particleboard, or plywood) for a veneer press, as shown below. Cut the platens slightly larger than the largest panel to be veneered. Also prepare cauls of 3⁄4 " hardwood 2" wide [Photo 6 below] by bandsawing or sanding one edge of each caul to create a smoothly-arced crown 1⁄16 " wider than the ends. Draw an arrow pointing to the high spot so it's easy to position the cauls during glue-up. When clamped, the arched cauls flatten to apply even pressure across the full width of the platens. Make enough cauls to clamp one every 4" on both faces of the panel.

Now cut a panel, called a substrate, to which the veneer will be glued. We like MDF because of its stability and flatness. For 1⁄8 - or 1⁄4 "-thick panels, tempered hardboard works well. Because veneer tends to slip on wet glue, cut each substrate about 1⁄2 " wider and longer than finished dimensions, and trim the panel to final size after veneering.
Next, decide if you want a book-match on the panel [Skill Builder, below]. For panels covered by a single sheet of veneer without a book-match, skip down to trimming the veneer in Step 5.
SKILL BUILDER
Using a single piece of plain-sawn veneer on a panel (below left photo) looks nice enough, but book-matching two pieces of veneer makes a panel really "pop" (below right photo). It's called a book-match because you take two sheets of veneer, sliced one after the other from the same log, and separate them as if you were opening the pages of a book. Wilder grain patterns, such as cathedral grain or burls, produce highly interesting panels.


Step 1 Choose two consecutively-sliced pieces of veneer and stack them so the grain patterns align as closely as possible. Apply painter's tape to the ends of the mated pair to prevent the sheets from shifting [Photo below].

Step 2 Trim one edge of the pair by drawing a fresh utility knife blade along a straightedge. Trim as little as possible from the veneer to preserve the intended book-match pattern.
Step 3 Joint the cut edges by sticking a piece of self-adhesive, 180-grit sandpaper to a block of MDF. Place the sheets of veneer on a scrap piece of MDF with the cut edges overhanging about 1⁄16 ". Then gently sand the cut veneer edges straight and square.
Step 4 Remove the painter's tape, and open the pieces like the pages of a book. With the good side of the veneer faceup, butt the jointed edges together, and draw the joint tight with short lengths of painter's tape stretched across the seam. Then lay another strip of tape down the full length of the joint.

Step 5Draw centerlines on opposite edges of the substrate panel, and then place the substrate on the veneer, aligning the marked centerlines with the taped joint line. Using a utility knife, trim around the substrate. Repeat this process to create a veneer sheet for the opposite face of the panel.

Step 6 Stand half of your cauls on a pair of risers with the crown of the cauls facing up, layer a platen and waxed paper on them, and get your clamps open and ready. Spread a thin, even coat of yellow glue on one face of the substrate. Align the veneer on the substrate (the taped side should face away from the substrate) and press it down; then place this assembly veneer-side down on the waxed paper [Drawing, top of page]. Spread glue onto the top face of the substrate and position the other veneer on it, taped face up. Place the second piece of waxed paper, the top platen, and the remaining cauls, then clamp the press firmly. Allow the glue to dry for at least four hours before removing the clamps.
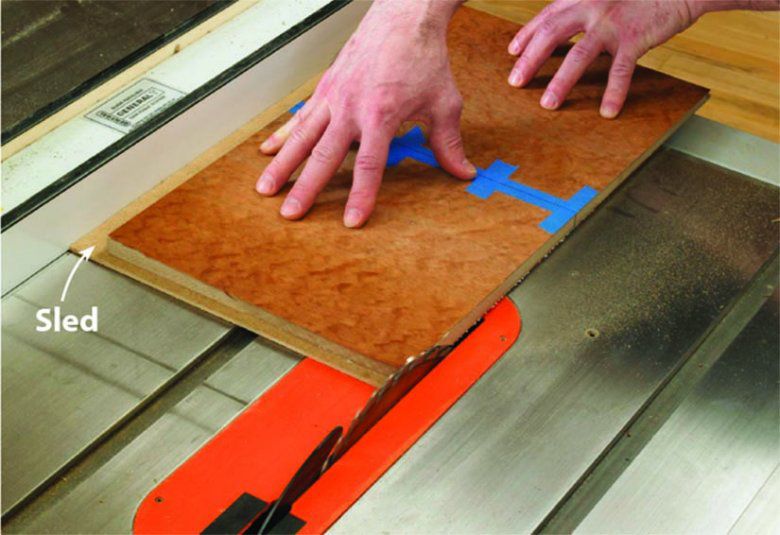
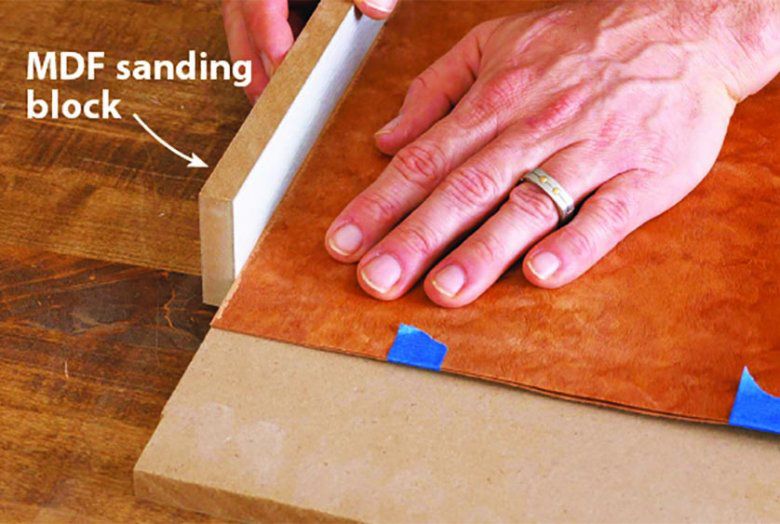
Step 7If the veneer shifted during glue-up so the pattern is no longer square to the edges, secure the panel to a sled using double-faced tape, and run the sled against the tablesaw rip fence to true up one edge. Use this sawn edge against the miter gauge or rip fence and trim the panel to finished size. If the veneer pattern remained square to the panel, true up one edge by sanding with 80-grit sandpaper on an MDF block to remove glue squeeze-out and any overhanging veneer. Then cut the panel to finished size.