What's the best way to fill in nicks?

Q:
No matter how careful I am, my projects sometimes have nicks that need to be filled. I've heard a little bit about a burn-in technique. How difficult is that skill to learn? Does it involve expensive equipment?
—Jerry Williams, Manchester, New Hampshire
A:
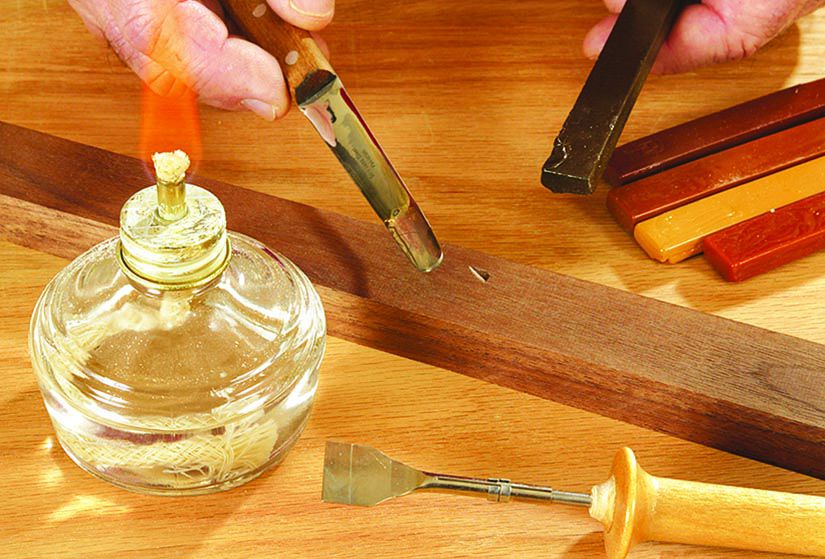
The technique is easy to learn and gives excellent results, Jerry, although it's best used on finished surfaces where you can match the final color. You'll need a narrow, thin-blade knife similar to an artist's palette knife, a wax or lacquer filler stick that matches or is slightly darker than the surface you're repairing, and an alcohol lamp. Alcohol burns clean and won't overheat your burn-in knife.
Heat the blade of the burn-in knife over the alcohol flame until it's warm enough to melt a stick of the color you selected, but isn't so hot that it damages the surrounding finish. You can even scrape a bit from two different sticks to make an intermediate shade. Pass the blade through the flame again until the scrapings liquefy, and quickly smooth the material as you lay it into the dent. Allow about a minute of cooling time, then level the patch with a cabinet scraper or razor blade. A quick sanding with 220-grit paper, and you're ready to apply a touch-up finish, if desired. Woodworking catalogs offer a wide range of colors for the burn-in sticks, and clear for repairing a chipped transparent coating.