Which sandpaper grits should I use?

Q:
In project articles, you often say "sand to 220 grit." But how do I know which grits to use before 220? And should I always sand to 220?
—Leonard Tucker, Brainerd, Minn.
A:
Before getting into specifics, Leonard, let's clarify how sandpaper works. Sharp grains of various materials (grit) attached to the backing paper scratch, or "abrade," the wood surface to remove high spots and render the board smooth with a uniform scratch pattern. Coarser-grit abrasives remove material quickly, but make deeper, more visible scratches. So you need to follow with sequentially finer grits to remove the scratches left by the previous grit, stopping when the wood feels smooth and the scratches no longer show.
Send your woodworking questions to askwood@woodmagazine.com
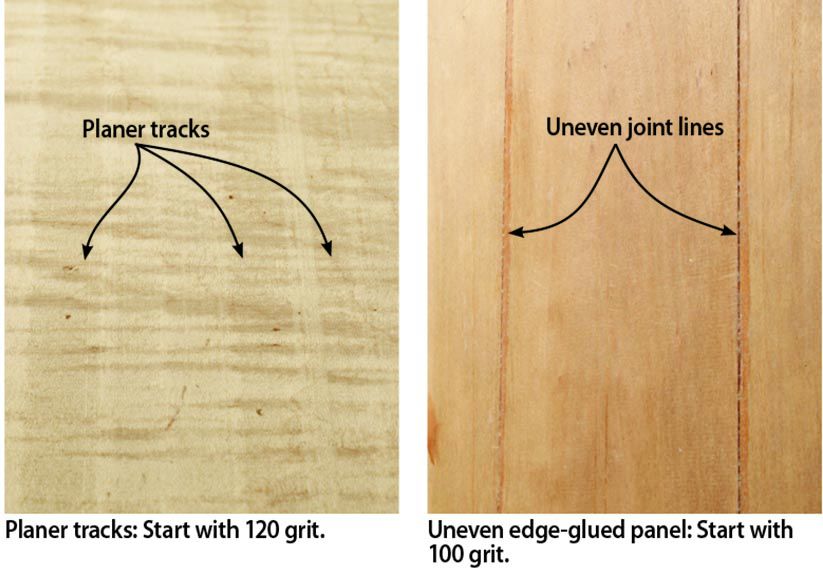
The grit you start with depends on the surface quality of your workpiece. On a board just milled to thickness with a well-tuned planer, you can usually start sanding with 150 grit. If you bought a presurfaced board, you might have to start with 120 grit to remove incidental scratches that were on the board when you got it. Typically, the only times to start with coarser sandpaper (80 or 100 grit) are on boards with deep scratches or gouges or uneven joints after gluing.

When determining which grit best follows the one just used, remember that the next grit should be no more than about 50 percent higher than the one before it; 100, 150, and 220, for example.
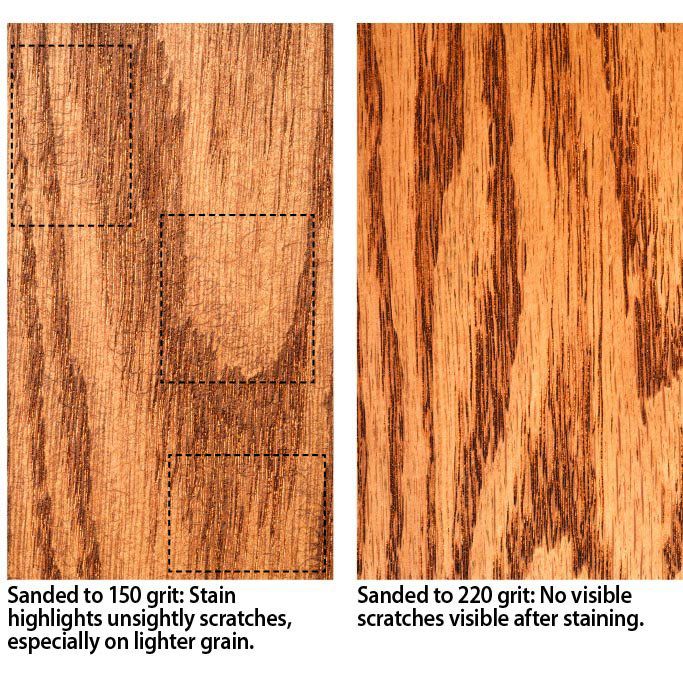
Now, when should you stop sanding? Fine grits close up the pores of the wood, so if you sand to too fine a grit, less finish will soak into the surface. Generally, if you're using an oil or clear finish, you can stop sanding at 180 grit. Continue on to 220 grit if you're using a stain or dye. (These colorants tend to amplify swirl or scratch marks.) Sanding to 320 grit creates a glasslike surface, but also one that accepts little stain, if that's your goal.