Woodworking Without a Tablesaw


Woodworking existed long before tablesaws. And although today's shops tend to center on a tablesaw, you can still do superb woodworking without one. Here's how.
Ripping
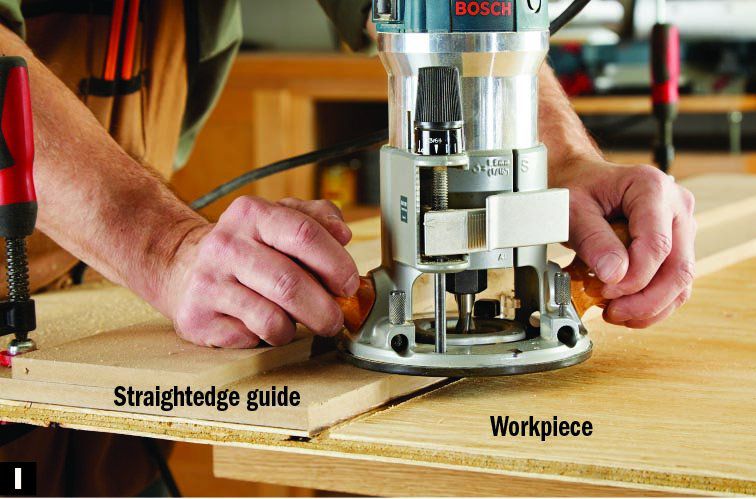
For cutting a board lengthwise, if the board has no true edge to begin with, turn to a tracksaw, or a circ saw with a straightedge guide. If the workpiece has a straight "factory" edge already, as sheet goods do, an edge guide may be a better choice [ Photo A].

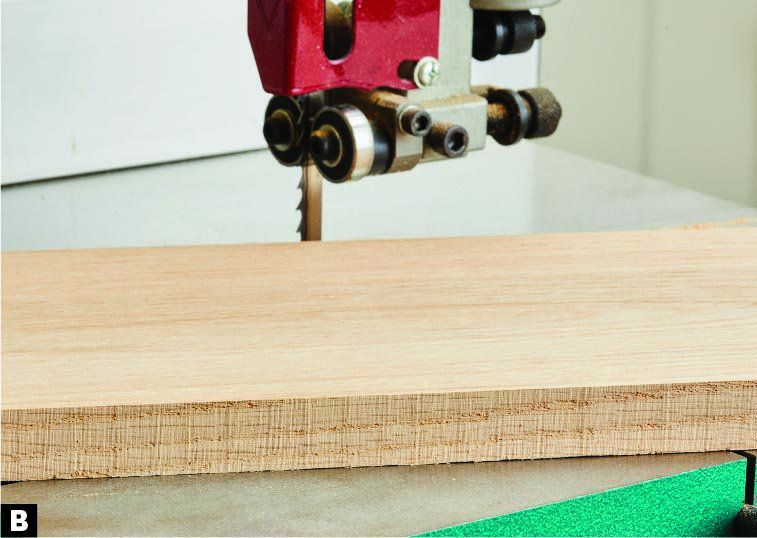
A well-tuned bandsaw with a fence can turn out straight rips as well, but the sawn edge typically needs cleanup [Photo B]. To cut several pieces of identical width, rip each one over-width, then joint one edge and plane their opposite edges as a group [Photo C].

A circular saw or tracksaw?
Two tools discussed in this article work similarly: a circular saw guided by a shop-made straightedge, and a tracksaw. Which you choose may come down to budget. Find circular saws for as little as $40, then construct a straightedge guide from scrap sheet goods. Spend a $300 minimum for a tracksaw and you'll get a saw with plunge action, a blade that tilts for bevels while still aligning with the guide's cutline indicator, the accuracy of a saw mated to a guide, better dust collection, and in some instances, clamp-free operation.


Pick the right blade for the job at hand
When choosing a saw, equip it with the right blade. For crosscuts, higher tooth counts (teeth per inch, or tpi) produce smoother sawn surfaces. Ripping requires fewer tpi to allow space between them to carry away the sawdust. Even the best blade dulls with use, so sharpen or replace it as soon as it shows signs of having lost its edge.

Crosscutting
Cutting boards across the grain is best accomplished with a well-set-up mitersaw [ Photo D]. For boards wider than the mitersaw's capacity, reach for a handsaw, circular saw [Photo E], or tracksaw.


You can also use the bandsaw for boards narrow enough to fit between the blade and front edge of the table, and short enough to feed steadily [Photo F].

Bevels
To bevel or chamfer stock up to 3⁄4 " thick, choose a chamfer bit [Photo G] in either a handheld or table-mounted router. For other angles, or for wider bevels, turn to a guided circ saw or tracksaw. You can also tilt the bandsaw table, guide the workpiece with a fence [Photo H], and clean up the cut with a few passes from a hand plane.


Dadoes, grooves, and rabbets
Get free instructions for the dado jig.
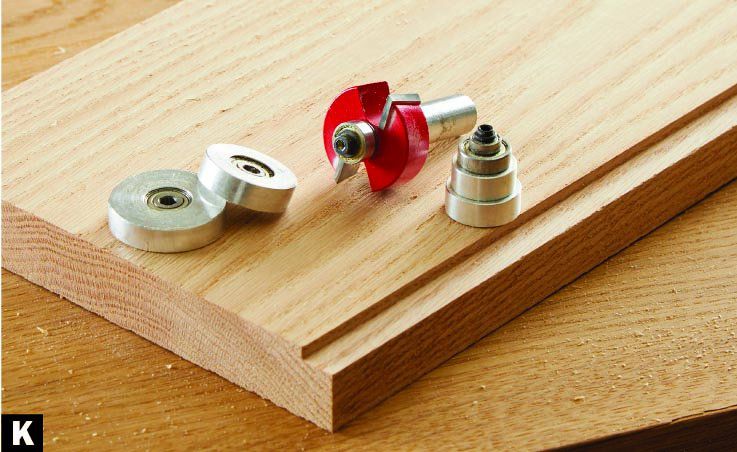
Use a straight bit in the router table or a handheld router to cut dadoes (a U-shape channel cut across the grain) [Photo I]; grooves (a U-shape channel cut with the grain) [Photo J]; and rabbets (an L-shape cut along the edge or end of a board) [Photo K].

Miters and beveled crosscuts
A mitersaw makes easy work of crosscutting a board at an angle across its face (a miter) or through its thickness (a bevel), although crosscut capacity decreases as the miter angle increases [Photo L]. Detents lock the blade at common angles, such as 21 1⁄2 °, 30°, and 45°. Sliding mitersaws provide the most capacity, with 12" sliders maxing out around 13" at 90°, when cutting 11⁄2 "-thick stock. For wider boards or panels, tilt the shoe of a circ saw or tracksaw.

Tapers
Cut tapers at the bandsaw [Photo M], and clean up the sawn face with a few strokes from a hand plane.

Sheet goods and panels
Size sheet goods and glued-up panels with a circ saw and straightedge, or a tracksaw. To create identical-size parts, cut them slightly oversize, then stack several, clamp them or apply double-faced tape between them, and cut all to final size at the same time [Photo N]. Create additional matched parts using a router and flush-trim bit [Photo O].


Joinery
The tablesaw cuts clean, accurate tenons, half-laps, box joints, and more. But these joints and others can be accomplished by other methods.
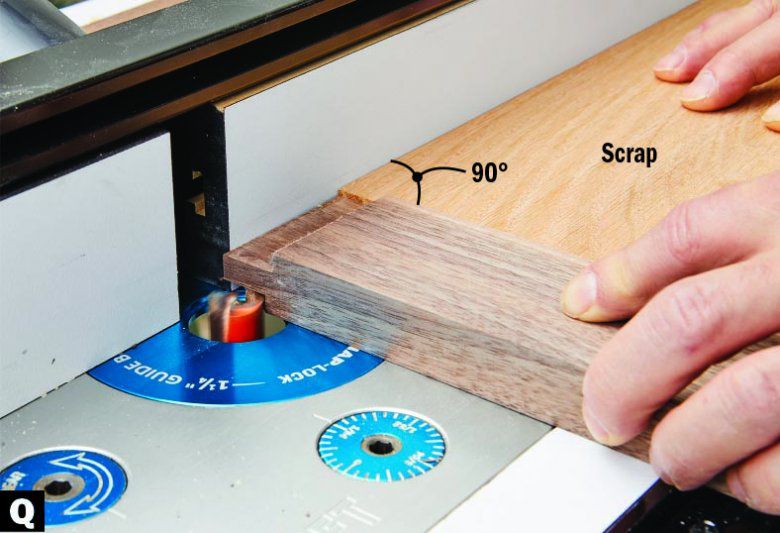
Tenons: Set up your bandsaw with a fence and stopblock [Photo P], use a straight bit in the router table [Photo Q], or cut them with a handsaw [Photo R].


Half-laps: A straight bit in the router table allows fine-tuning the joint as you work for a flush fit on both faces [Photo S].

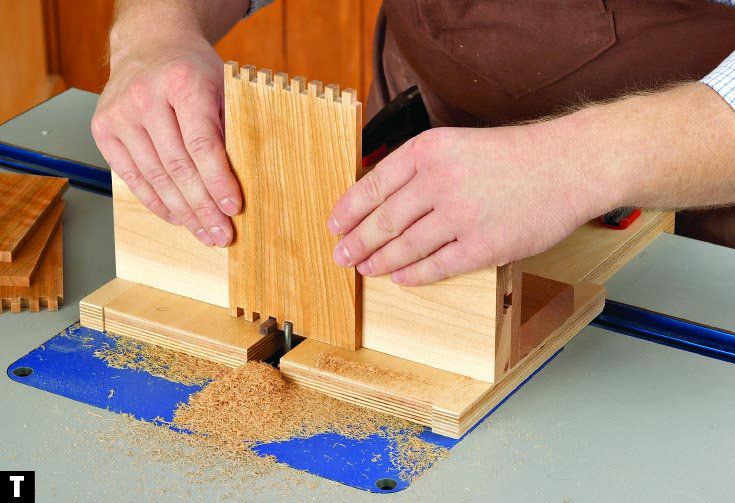
Box joints: A box-joint jig works just as well on a router table as on a tablesaw [Photo T]. Fingers must match the width of a router bit.
Splines: Cut a groove the length of an edge at the router table [Photo U]. Strengthen and dress up miter joints by routing slots through them [Photos V, W], then gluing in splines.


