Work Wonders With Waxes


For centuries, woodworkers have known the benefits of wax as a finish. Wax goes on easily, never runs or drips, highlights the figure in the wood, provides easy maintenance and repair, and leaves a surface that feels silky smooth. Apply it to bare wood or over other finishes, such as varnish, for an extra layer of protection. The downsides: Wax doesn't tolerate exposure to water, and it's not meant for areas that will see a lot of wear.
While clear, or natural, waxes provide all of those benefits, decorative specialty waxes go a step further by adding eye-catching appeal to your projects. Here's how to put them to use on your projects.


Impart color and protection in one step
Applied to bare wood, wood-tone colored waxes ranging from light browns to mahoganys to ebonys mimic wood stain while adding a protective topcoat. A colored wax also highlights the wood grain.
Apply the wax across the grain to force the pigment into the pores of the wood. Use a dark color on lighter woods to emphasize the grain while adding just a bit of color to the surrounding wood, as shown above. Liberon recommends using their oil-free 0000 steel wool for applying thin, even coats, but a cloth also works well. Make a final pass parallel to the grain. After the wax dries, buff it with a soft cloth to create an attractive satin sheen.
If you find streaks or swirl marks in the wax after buffing, it means you applied too much wax. To remove the excess, apply another light coat in the direction of the grain to dissolve the streaks, then buff with a clean cloth. Additional light coats of colored wax add a richer tone to the finish.
Make a colored wax the final coat of finish. Applying a clear wax over it may dissolve and remove some of the colored wax. You can use this to your benefit, though, to lighten the tone of colored wax already applied.
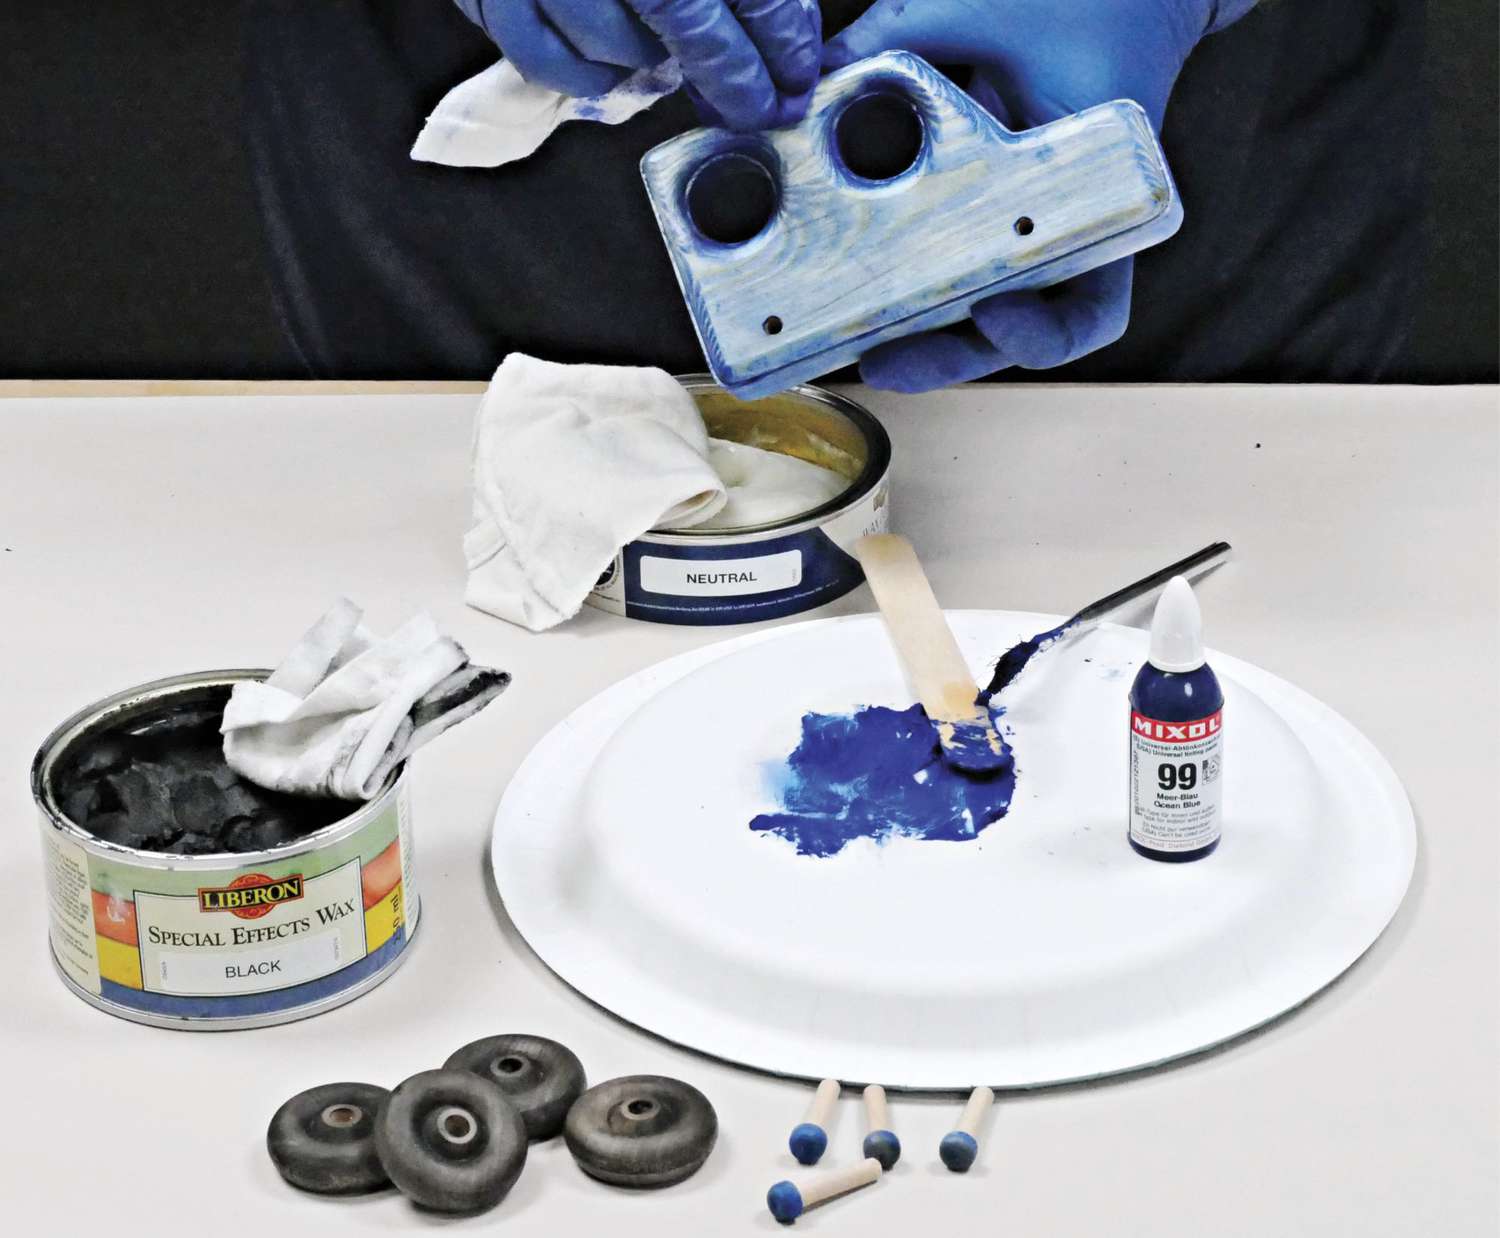
Wax won't chip or flake like film-forming finishes, making it a child-safe way to finish toys. For kid-appeal colors, add tinting paste, such as Mixol [Sources], to neutral wax (photo, below). Highly concentrated and compatible with most finishes, it takes just a few drops to add a burst of color to a wax finish.
To color the wax, scoop some neutral wax onto a mixing surface or into a container, add a few drops of Mixol, stir well, and test the color on project scrap. Add more tint as needed until you get the desired color, then apply it as you would any other wax, buffing it to a shine after it dries.
Whitewash with liming wax
The process of liming wood originated by applying the mineral lime (and, later, white lead) to wood floors to act as a pesticide.

A limed finish creates an antiqued look. It's in fashion with the English-countryside farmhouse style. White pigment in the wax fills in the pores of the wood, highlighting them. This effect works best on open-pore woods such as oak and ash.
Wipe on liming wax with a lint-free cloth. (Steel wool leaves particles that make the wax appear gray.) A little goes a long way. As with other pigmented waxes, rub the wax across the grain (photo, below). Before the wax dries, make a light pass with the grain to eliminate streaks.
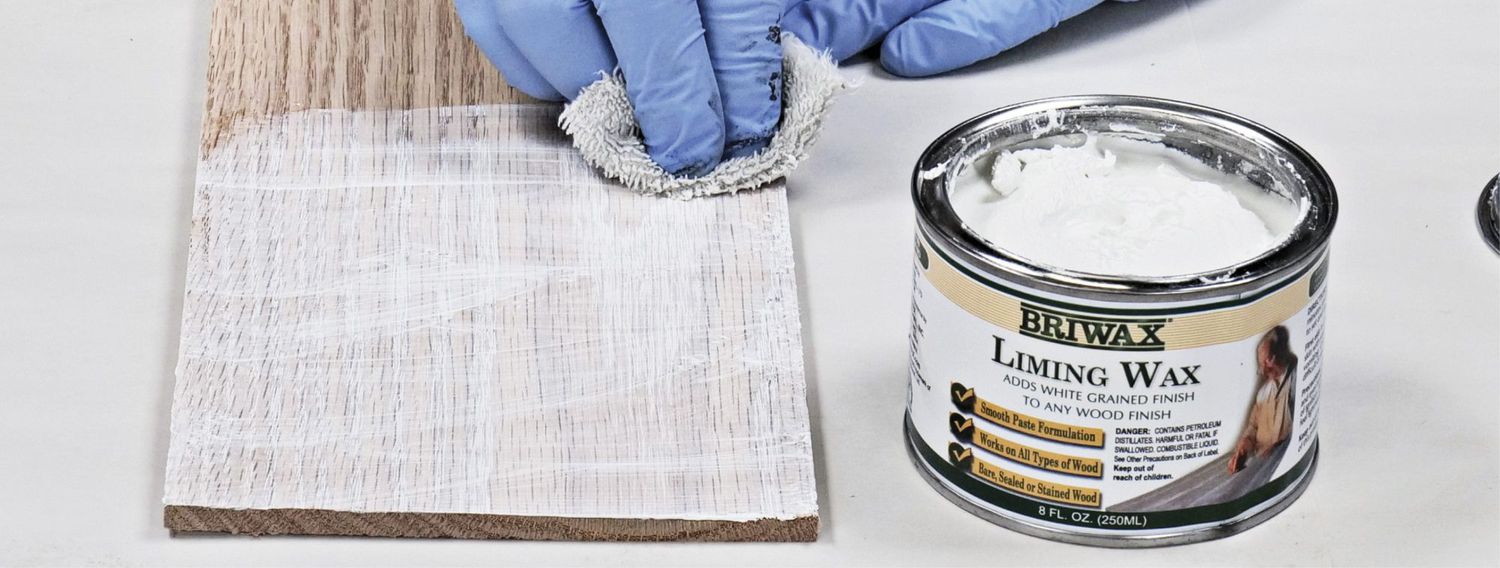
Let the wax dry for a few minutes, then buff off the excess for a satin sheen. What remains on the surface creates a thin, whitewashed effect. For added protection, apply two or three thin coats.
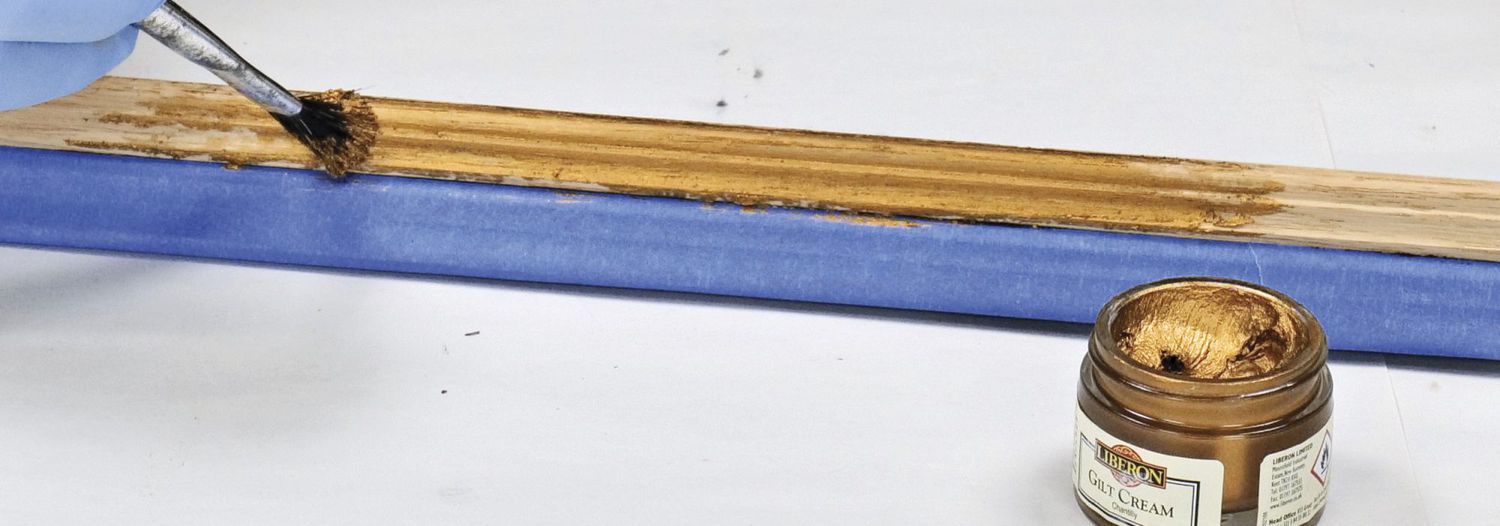
All that glitters...
Framers use gilt cream to add a metallic detail of gold, silver, or other colors to frames. Like other waxes, it doesn't take much to do the job. One jar will last for many projects.

Apply it in several thin coats—as the name suggests, it has a creamy texture—and buff it smooth with a soft, clean cloth. For built-up moldings or appliques, apply gilt cream to individual pieces before installing them on your project. Alternatively, you can mask off areas before application (photos, below). Highlight small details by using a small, stiff brush to apply the gilt cream to specific areas.

Add age instantly
Patinating wax, a black, highly pigmented wax, creates the look of antique furniture by adding patina—which is a nice way of saying it mimics the years-long buildup of dirt and grime. It's a great way to add an aged look to any finish.

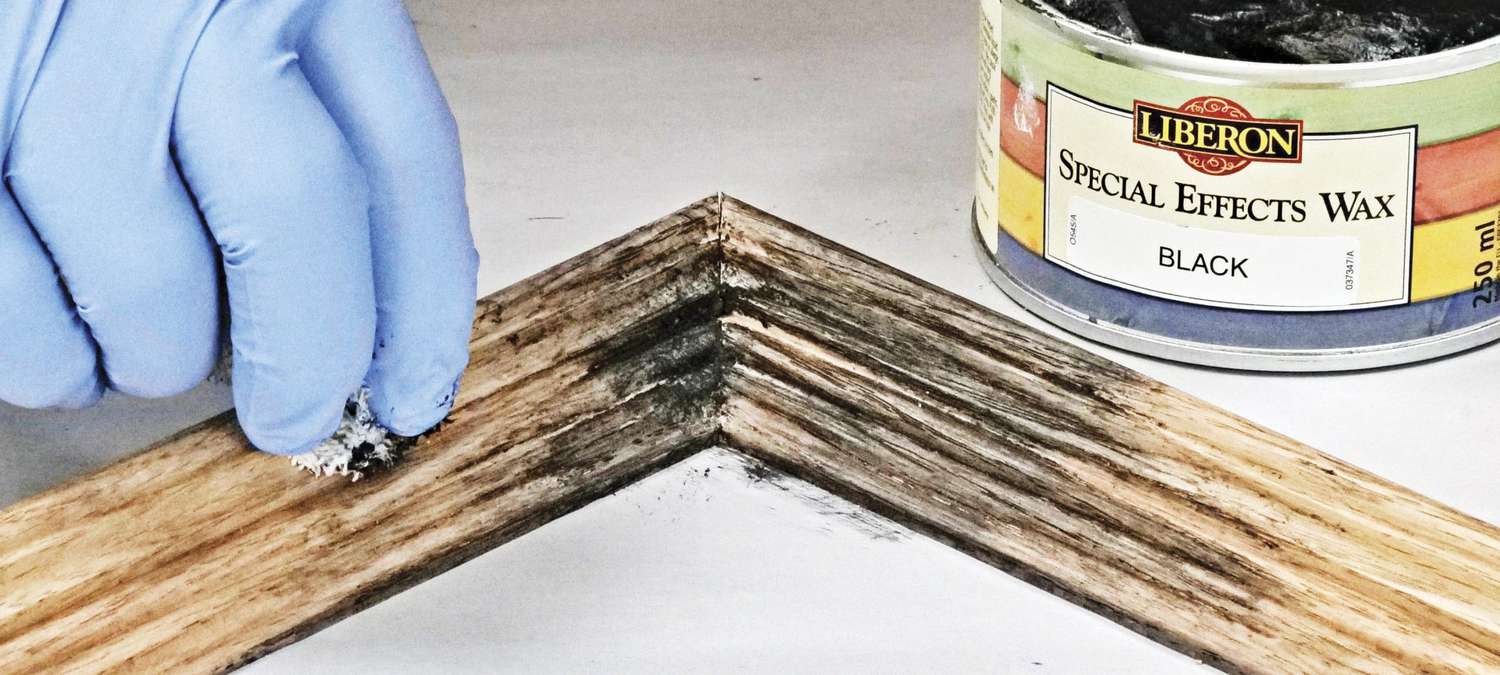
Patinating wax works best on projects with a lot of nooks, crevices, or moldings. Use a rag, steel wool, or stiff brush, such as a disposable glue brush, to work the wax into these corners and recesses (photo, above). Then wipe off the excess with a cloth, leaving a bit of the wax in the corners and recessed areas of molded profiles. Using a lint-free cloth, buff the high areas, or spots that would normally see the most wear during the piece's lifetime, removing most of the color.

Applying a coat of clear wax removes more of the patinating wax from the high spots, further accentuating the recesses. How much patinating wax you remove depends on the look you want (photo, above).
Sources: Find waxes, gilt creams, and Mixol tinting pastes at woodcraft.com, rockler.com, and amazon.com. Liberon products are also available at talasonline.com.