"X" out screw heads

1. Place them out of sight
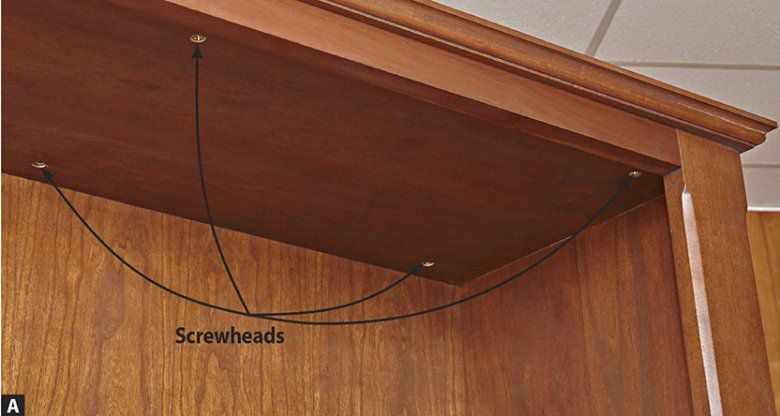
Perhaps the most obvious way to hide screws is simply locating them where they can't or aren't likely to be seen, such as the underside of a cabinet top or tabletop [Photo A], or on the back face of a cabinet.
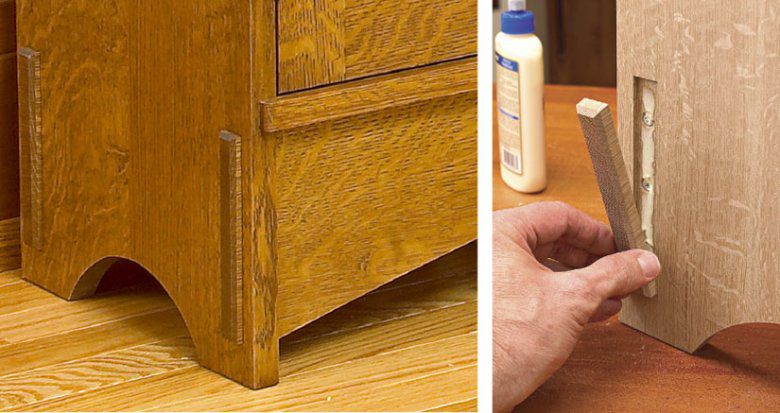
2. Cover them with other parts
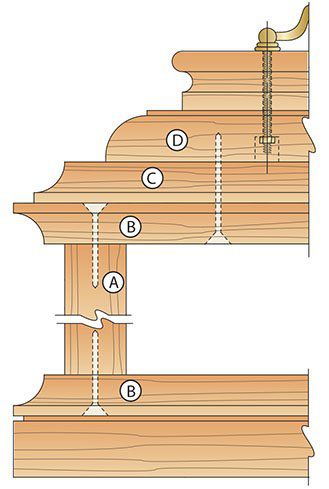
If screws must be used on the visible faces of a project, take time during the design process to find or create locations where a length of molding or another part of the project will hide them [Photos B and C, Drawing]. Just remember that once covered, the screws will be difficult, if not impossible, to access, so make sure you don't need to reposition or disassemble any parts before applying the concealing piece.


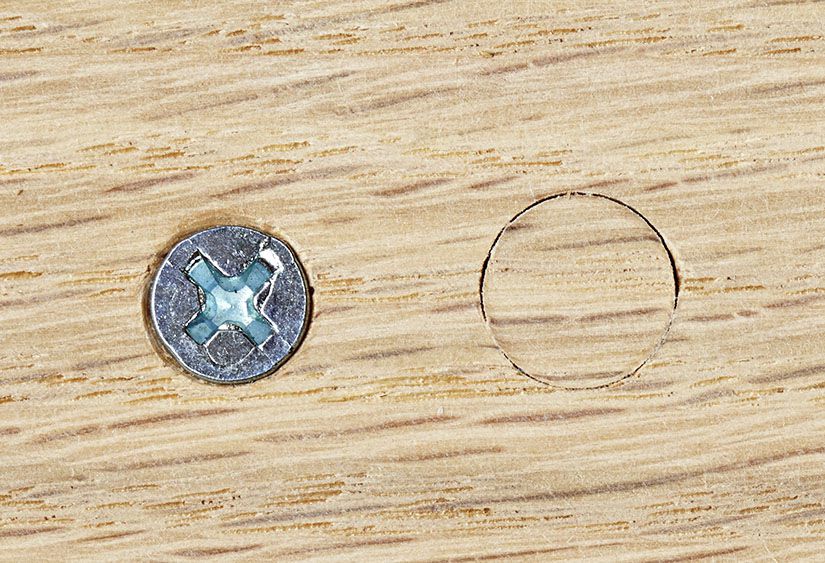
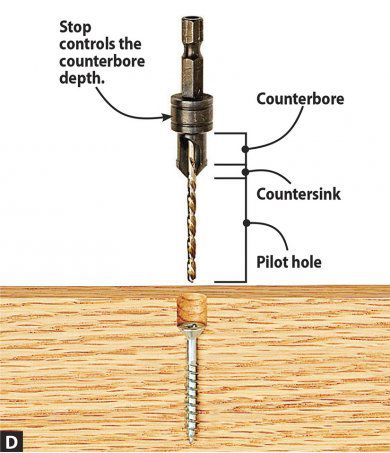
3. Bury them in counterbores
A counterbore recesses a screwhead below the surface of a workpiece [Photo D]. You then plug the counterbore to either hide it or highlight it [Photo E].

You can buy plugs or make your own. Store-bought plugs rarely match the tone of your project stock. And because such plugs are usually cut from dowels, their end grain soaks in more stain than the face grain around them. As a result, they stand out instead of blending in. Of course, you can use this difference as a visual detail, even choosing a contrasting species.
To best camouflage a plug, cut your own from scrap material from your project, using a plug cutter in a drill press [Shop Tip]. This gives you a near-perfect match in grain and wood tone once the plugs are glued in place with the grain aligned as closely as possible, as shown below; trimmed with a chisel; and sanded flush.
Buttons stand proud of the wood's surface and serve as pronounced decorative elements. Find them in many different sizes and styles—even square-head types for an Arts and Crafts look.
By chiseling out a shallow rectangular recess around screw locations, you can insert plugs that make screwed butt joints resemble through-tenons. (To learn how, see More Resources.)
Create plugs in a snap
To make your own wood plugs, use a plug cutter [Sources, below]. Sold in 1⁄4 ", 3⁄8 ", and 1⁄2 " diameters, plug cutters resemble drill bits with multiple fluted cutting edges. As they spin, they create plugs of wood that you then pop free with the tip of a chisel. Tapered cutters create slightly cone-shape plugs that wedge tightly into counterbores for a gap-free fit.

Because they lack pilot bits, do not use plug cutters in a handheld drill; you'll achieve the best results using a drill press.
Sources: Insty-bit countersink bit set, #6, #8, and #10, $24.75, woodmagazine.com/countersinks
Snappy plug cutter set, 1⁄4 ", 3⁄8 ", 1⁄2 ", $28.32, woodmagazine.com/plugcutters
More Resources
What appear to be the through-tenons of the lower rails extending through the sides of this bookcase, right, are actually chamfered plugs covering screws that secure butt joints, below. To create this look, rout or drill the recesses before assembly, then chisel the ends square. Shape the chamfered tenon ends on a long blank, and cut them free.
For the full detailed technique, check out issue 180 (November 2007) of WOOD® magazine or read the article for free at woodmagazine.com/fauxthru.