Your First Hand Tools….and Why

Choosing power tools often comes down to comparing spec sheets, and selecting the tool with enough power and features to suit your needs and budget. Hand tools, on the other hand (sorry), require a more subjective selection when you factor in the feel of the tool in your hand and the wide range of prices for seemingly similar items. And how do you determine which tools you truly need?
To give you a head start on your hand-tool must-have list, we gathered the wisdom of the WOOD® magazine staff and contributors speaking from more than 400 years of collective woodworking experience. These items rose to the top as our picks for a solid starter set.
First, some generalizations
"All generalizations are false, including this one."— Attributed to Mark Twain
Beyond the tools themselves, three overarching hand-tool principles emerged from the staff's discussion.
■ Pay for quality. The vast majority of us must work within a budget for tool purchases, so low-cost tools have an initial appeal. But some tools cost twice that of seemingly identical tools for good reason: Better materials, machining, fit, and finish all contribute to a tool that works better and lasts longer. So saving up to buy a higher-quality tool often pays off in the long run. As the saying goes, "Cry once when you buy it, or cry every time you use it."
Automatically search the web for a specific item and have results emailed to you. Learn more at google.com/alerts.
■ Used tools offer great bargains. Consider this the other end of paying for quality, because quality tools often outlast their owner. Research the tool you need, then keep your eyes open for used units online, at auctions, and at garage and estate sales. By understanding what makes it a quality tool, you can assess the condition and functionality of a used model and intelligently inspect for defects and damaged or missing parts.
■ Learn to tune and sharpen. Planes and chisels, whether brand new or previously owned, require sharpening throughout their lifespans—in fact, you may touch up an edge several times a day during frequent use. A razor-sharp cutting edge makes using a tool enjoyable, rather than frustrating. Master sharpening and many of the objections to using these hand tools disappear.
Give yourself an edge
Compare sharpening media and learn to sharpen. woodmagazine.com/getsharp
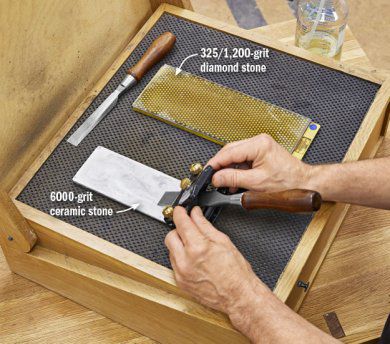
Four of our six selected tools require sharpening, so to emphasize the importance of keeping a keen edge, sharpening stones and a honing guide earn the top spots on the list.
Make this self-storing sharpening station.
woodmagazine.com/sharpstation
Any sharpening media, from sandpaper to diamond stones, can get you a sharp edge. Our preference for convenience and durability combines a double-sided diamond stone of 325 and 1,200 grit for initial shaping, and a 6,000-grit ceramic stone for final honing and touch-ups, below.

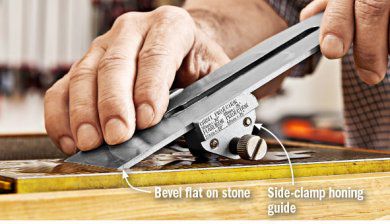
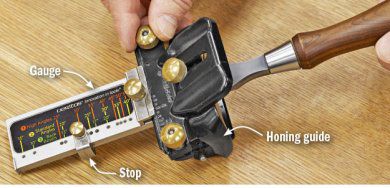
To maintain a consistent bevel angle on a cutting edge, a honing guide pays big dividends. A simple side-clamp honing guide, above, holds the blade square, but you must set the bevel by eye, or make your own gauge to set the blade protrusion. A honing guide that comes with a gauge ensures consistent results for various bevel angles every time, below.
Sources: DMT DuoSharp extra-fine/coarse (1,200 and 325 grits) diamond stone no.W8ECNB, $128, dmtonlinestore.com;
Shapton 6,000-grit ceramic stone no. 834944, $76, woodcraft.com;
Side-clamp honing guide no. 92651, $15, rockler.com;
Veritas Mk. II standard honing guide no. 05M0901, $75, leevalley.com.
Find a winning combination
Discover all the things a combination square can do. woodmagazine.com/combosquare
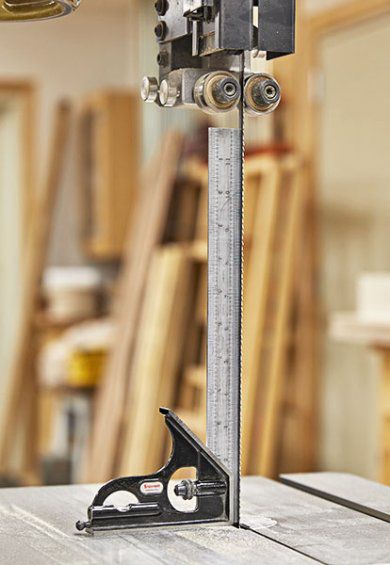
A combination square does so many jobs, we can't imagine setting up shop without one. Measure dado and rabbet depth and cutter height, lay out square and 45° lines, check tool setups for square, and use it for all sorts of measuring. Some prefer a 6" rule (or blade) so they can tuck the tool in an apron pocket; others want the greater capacity of a 12" rule. In either case, look for laser-etched and easily readable scales with 1⁄8 ", 1⁄16 ", and 1⁄32 " increments along different edges (some rules provide 1⁄64 " or millimeters on the fourth edge). Check for a no-play fit between the rule and head, an easy sliding action of the rule, and a positive lock when tightening the rule in position. Our preferred Starrett combo square offers accessories such as center-finder and protractor heads, and different-length rules, so the tool's usefulness can grow along with your skills.
Make your mark
Precise layouts and cuts begin with a fine line when marking joinery and dimensions. A sharp marking knife severs fibers as you draw it along a rule, creating a narrower line than that of a pencil. Besides precision, the line provides a positive registration for cutting with a chisel or saw, and reduces tear-out. Because you don't use a marking knife for deep cuts, the marking edges require only an occasional touch-up on your finest-grit sharpening stone.

Get a 2-for-1 saw
Make your own bench hook.
woodmagazine.com/benchhook
To break down boards and cut pieces too small to work safely on power tools, reach for a handsaw. A ryoba provides rip teeth on one edge of its thin blade and crosscut teeth on the other. Cutting on the pull stroke gives you better control. A ryoba comes ready to use, and when the teeth get dull, simply buy a new blade to insert into the handle. Find a ryoba online and at woodworking stores for $30–$50.

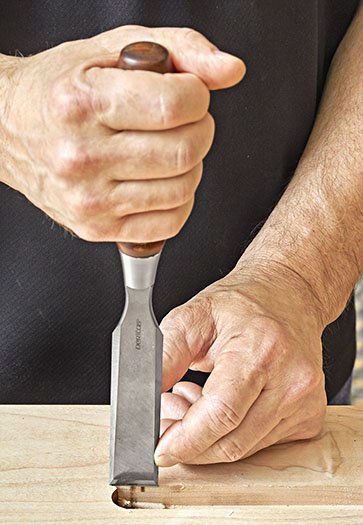
Set up a chisel set
Most bench chisels have 5–6"-long blades with bevel-ground sides for reaching into tight areas and corners.
A set of 1⁄4 ", 3⁄8 ", 1⁄2 ", 3⁄4 ", and 1" bench chisels will serve the majority of tasks. Add wider or narrower widths as needs dictate. Buying used can save money, especially if you don't care if the set matches. For new chisels, a lower price typically indicates softer steel. It sharpens easily, but requires more frequent sharpening. Look for, or reshape, wood handles to provide both a comfortable grip, and facets so they won't roll off the bench.
Get great results every time you pick up your chisels. woodmagazine.com/chisels

Sources: WoodRiver 6-piece set no. 151268, $110, woodcraft.com; Veritas 5-piece set no. PM-V11, $429, leevalley.com.
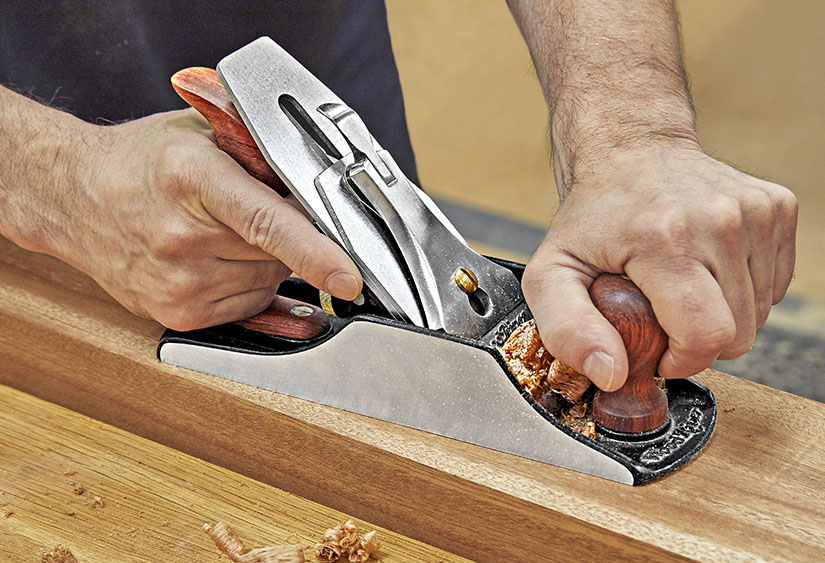
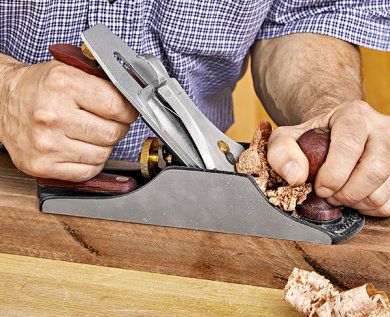
Smooth things over
For a first plane, more staff recommended a no. 4 or no. 4 1⁄2 smoothing plane, below, over a no. 5 jack plane. The reasoning: A no. 5 does a lot of jobs, such as jointing, flattening, and smoothing, fairly well (the "jack plane" moniker came from "jack of all trades"), but it takes some skill and experience to make it do any job really well. A smoothing plane specializes in finishing surfaces quite well. And because you use it for taking light shavings, it doesn't demand as much muscle, making it an ideal plane for developing your technique.
Sources: Lie-Nielsen no. 41⁄2 smoothing plane, $325, lie-nielsen.com; WoodRiver no. 41⁄2 smoothing plane, $219, woodcraft.com.
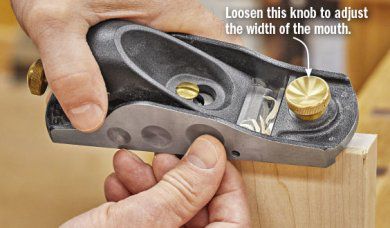
Add a just plain handy plane
Learn to tune and use a block plane. woodmagazine.com/blockplanebasics
A low-angle block plane fits into an apron pocket, and that's good, because you'll reach for it often. Make a few strokes to soften an edge with a round-over or chamfer, below, remove tool marks from a workpiece face or edge, fine-tune a part's fit, or smooth a joint line. And all that in less time than it would take to set up a power tool for the same task. We recommend a low-angle plane, as it more easily shaves tough end grain.
Sources: Veritas no. 05P2271, $169, leevalley.com; Lie-Nielsen no.601⁄2 , $175, lie-nielsen.com