Your Next Hand Planes


Level up your hand plane game with these options.
When you start out using hand planes, you'll get plenty of advice on which ones to purchase first.* Once you get past the low-hanging fruit, though, the choices for which planes to acquire next become more dependent on what kind of work you intend to do and your overall commitment to hand tools in general. Keep that in mind as you consider these candidates put forward by the WOOD® magazine staff.
*Spoiler alert: A low-angle block plane, shoulder plane, and medium bench plane (a no. 4 or no. 5) top our list of must-have planes. Find out why.

Jointer plane
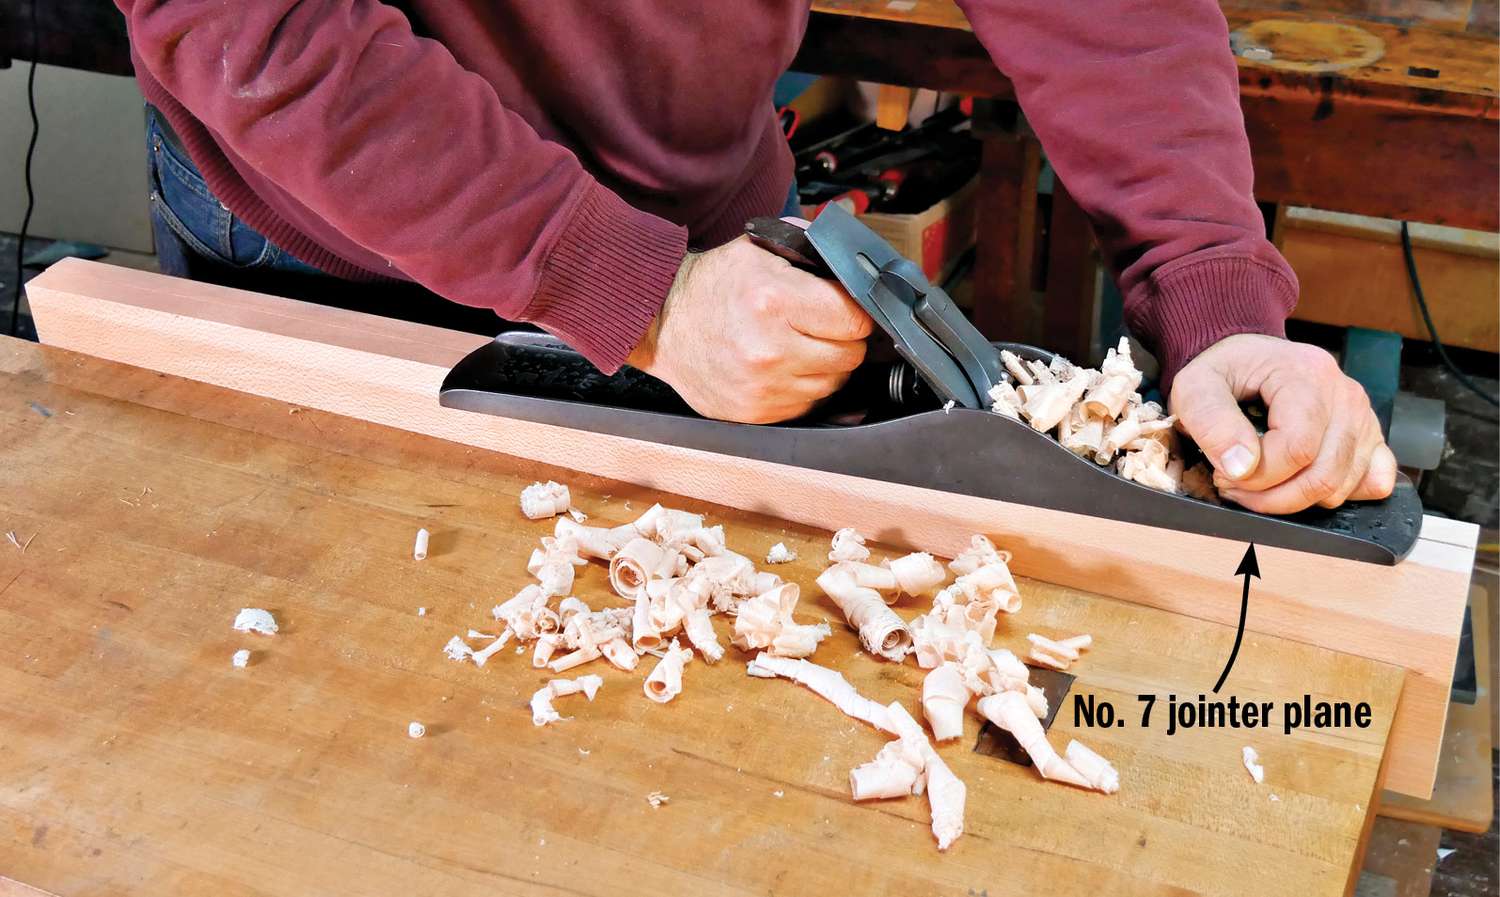
You can't go wrong purchasing a jointer plane as your first "next" plane. As you might guess from the name, jointer planes excel at jointing the edges of boards in preparation for gluing (photo, above). Their 22–24" sole length spans low spots, planing away the peaks of a board until you flatten the edge or surface.
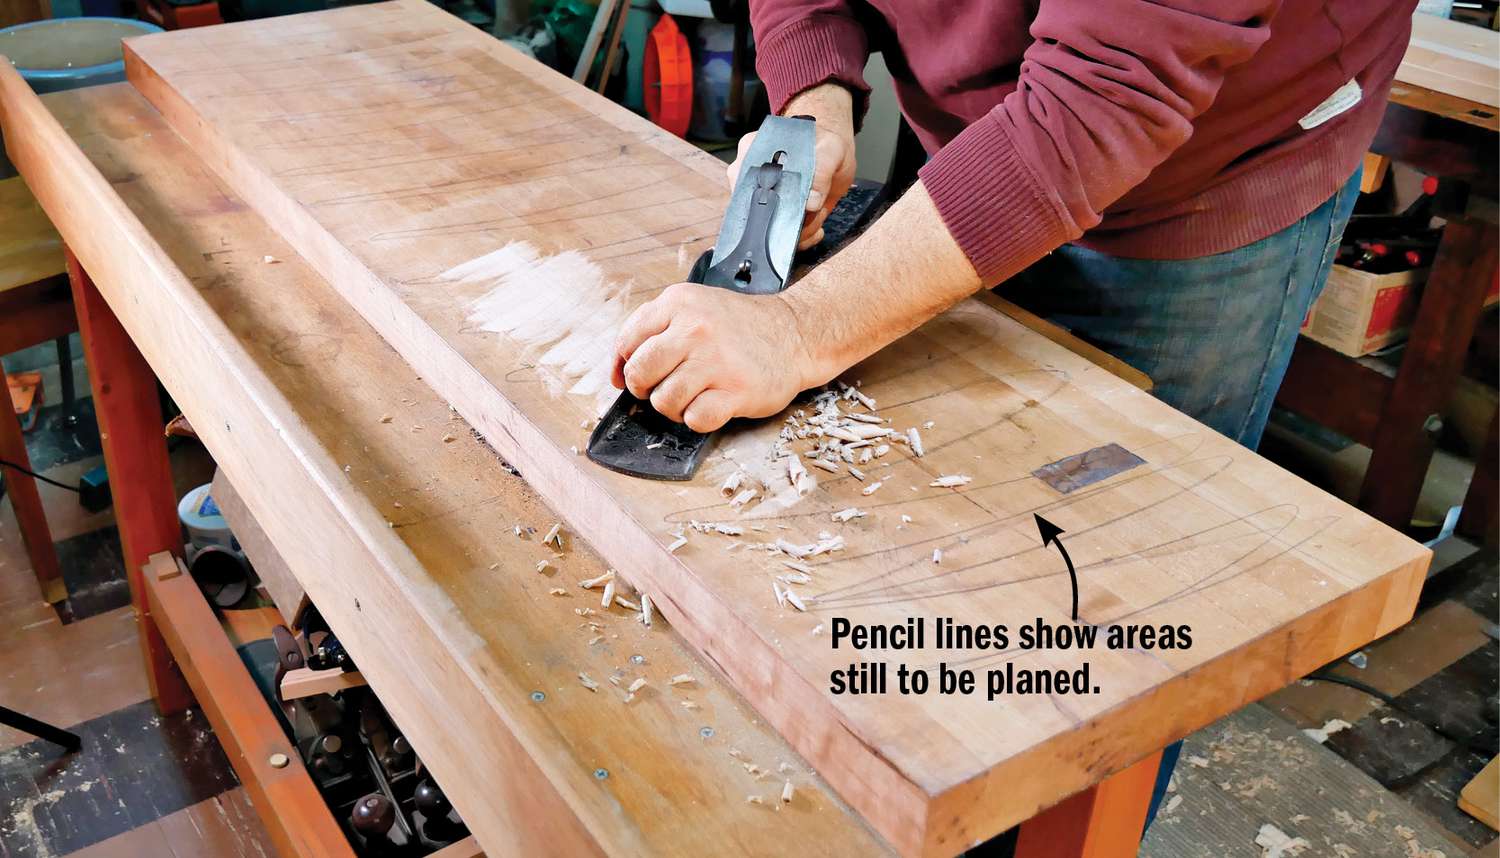
But it's not all about the length. Once the plane starts moving, the extra mass provides momentum that powers it through cuts easily. This makes a jointer plane ideal for flattening wide boards or glued-up panels (photo, above).
We recommend a no. 7 as a practical, all-around jointer plane. It hits the sweet spot in terms of size vs. convenience. The no. 8 measures a couple of inches longer and 1⁄4" wider, but unless you possess forearms like Popeye, the extra weight will tire you out sooner during long planing sessions. Plus, the 2-5⁄8" blade of a no. 8 may be too wide to fit in some honing guides.
Duplex rabbet plane
A rabbet plane cuts one of the most basic of all woodworking joints. You'll find several different types, but all rabbet planes have one thing in common: The blade extends flush with (or a "hare" beyond) the sides of the plane body. This allows the plane to cut cleanly into the corner of a rabbet.
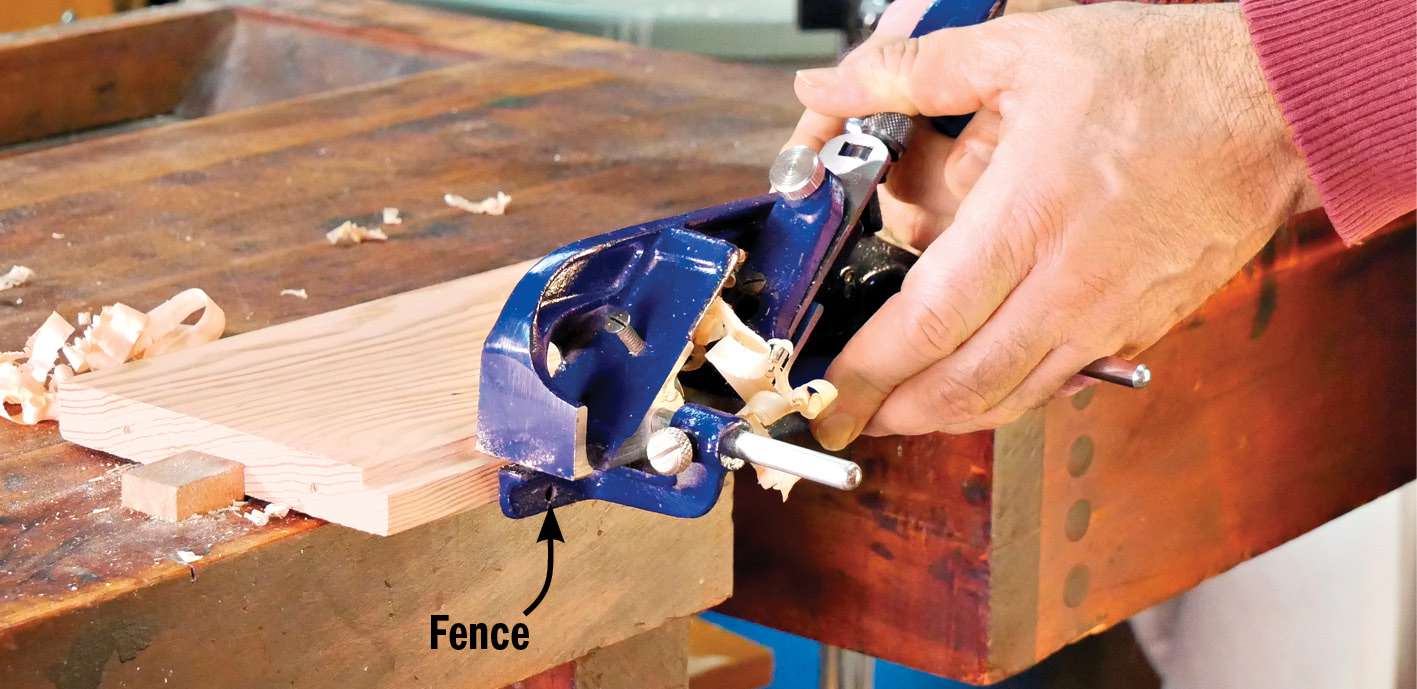
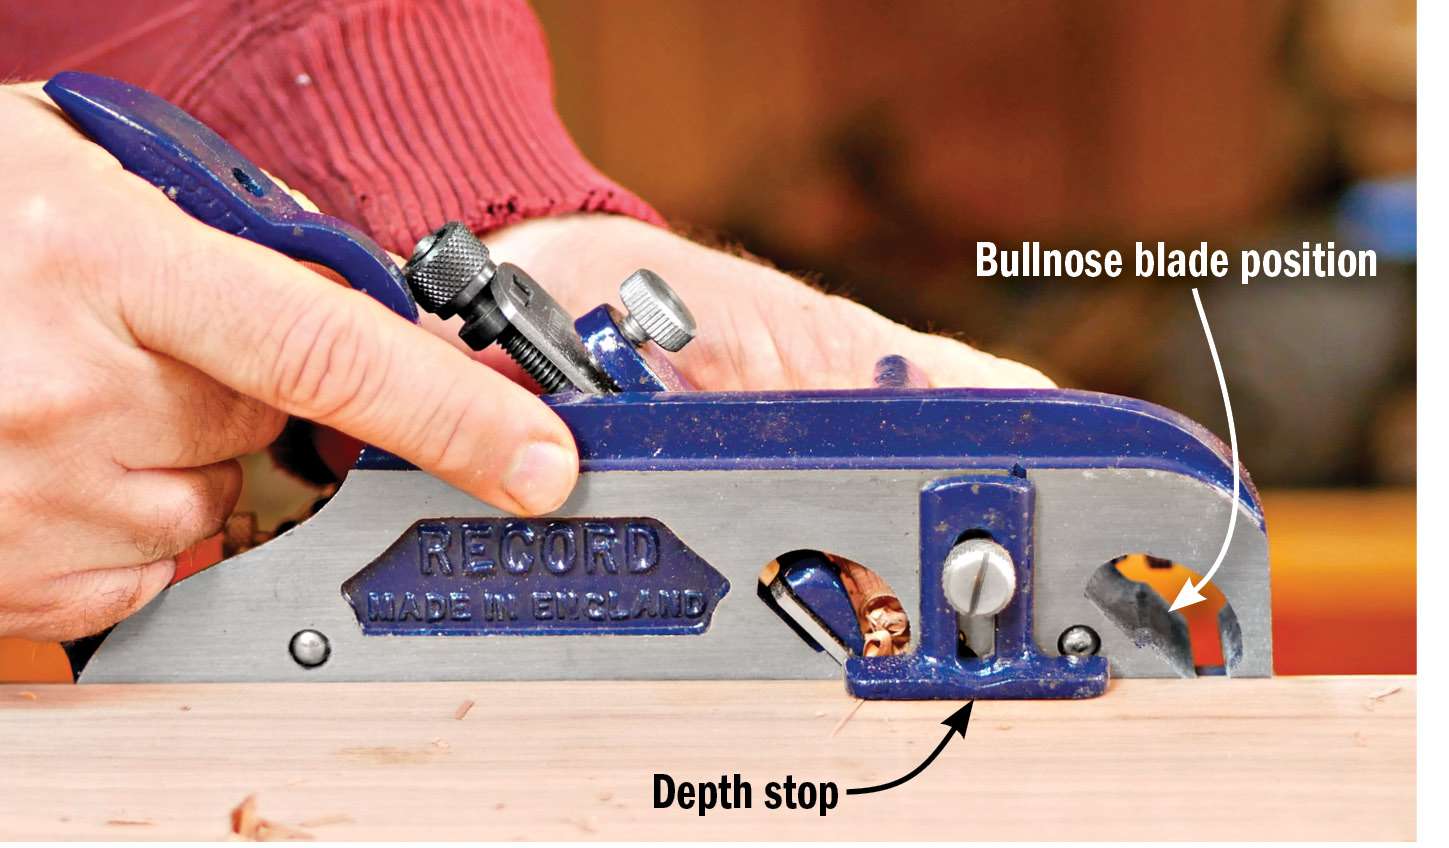
Some rabbet planes function like shoulder planes, simply trimming and refining the fit of an existing rabbet or shoulder. For cutting rabbets from scratch, choose a duplex rabbet plane with an adjustable fence that fixes the width of the rabbet, as well as a stop to control the depth (photos, above).

Also look for one with a nicker, or spur, to score the wood fibers when cutting rabbets on the end of a board, reducing chip-out (photo, above). The "duplex" in the name refers to the fact that it offers two blade positions: a standard rear position and a bullnose position for working the front of the plane into a corner.
Router plane

Like the motorized version that shares its name, a router plane cuts grooves and reccesses. For making just one or two grooves, a router plane often performs faster (and quieter) than a router. And unlike a router bit, the square cutter of a router plane can reach all the way into the corners of a square notch or recess, making stopped dadoes and grooves an easy task (photo, above).
On a router plane, a narrow (1⁄4" or 1⁄2") cutter projects through a small throat opening in the body of the plane. Grip a knob on each side of the cutter to guide it through the cut, then use the adjuster to lower the cutter after each pass to deepen the dado or groove. The control offered by the adjuster makes this plane ideal for exacting tasks, such as inlay work or cleaning out a hinge mortise.
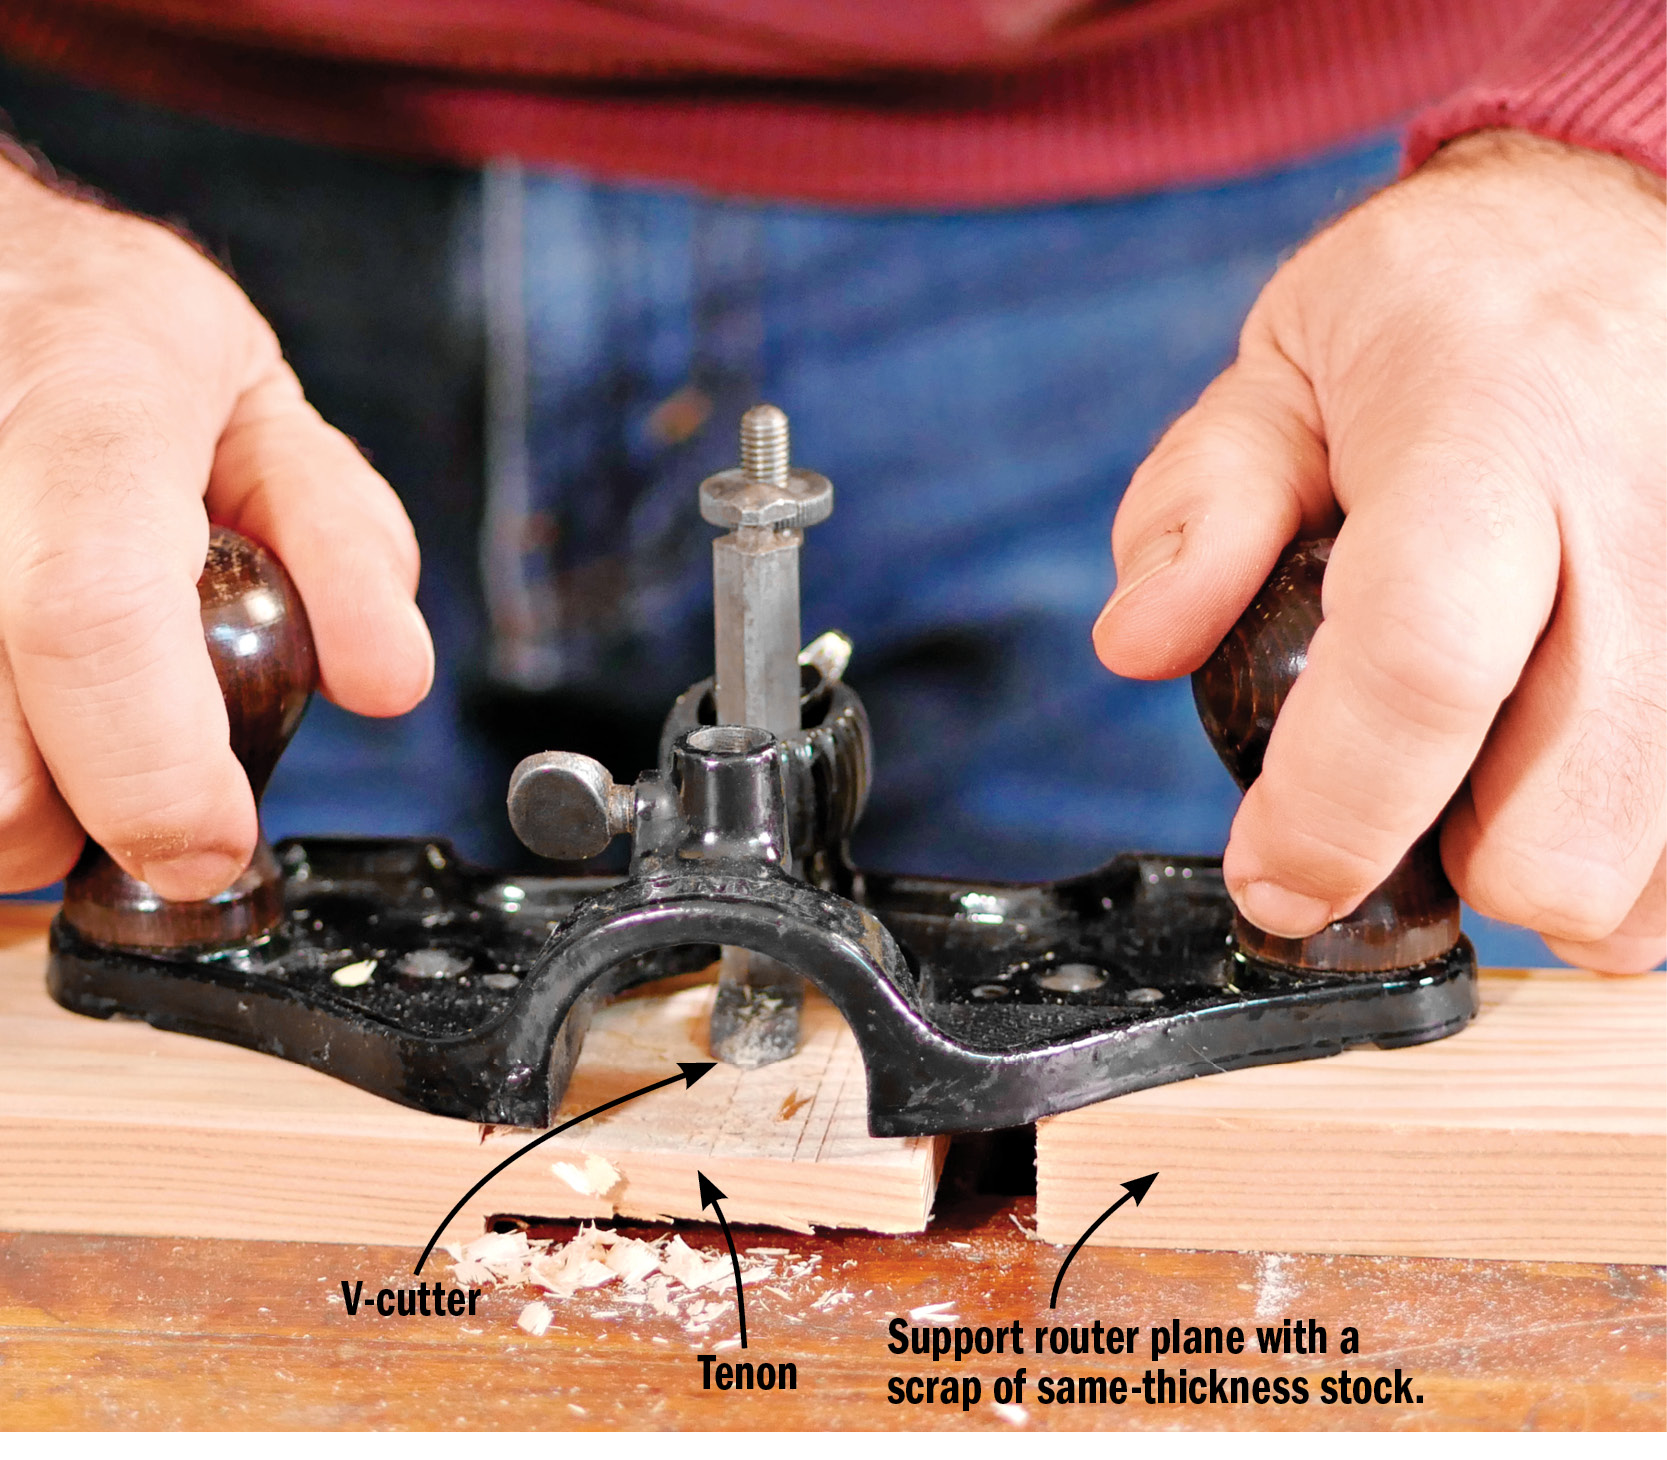
Like the edge guide on a power router, some router planes have a fence to guide the tool when routing a groove parallel with the edge of a board. Some router planes also come with a V-cutter for smoothing the bottom of a groove or recess. Use this cutter to clean up ridges left behind by a dado blade or to fine-tune the thickness of tenons (photo, above).
Scraper plane
A well-tuned card scraper creates wispy shavings, leaving behind a glass-smooth surface that doesn't require sanding. The friction created also burns the heck out of your thumbs in the process. But mount a scraper in a plane body and you have an easier-to-control tool you can use without discomfort. Scraper planes deliver excellent results on highly figured wood or boards with difficult grain.
A basic scraper plane, known as a cabinet scraper, looks similar to a spokeshave and holds the blade at a fixed angle (Opening photo). Tightening a knob or thumbscrew bows the scraper blade for a heavier cut, the same way you would with your thumbs. After rolling a hook on the edge of the blade and installing it in the body of the plane, scrape the surfaces of your project as the final step before applying a finish.

One of our favorite scraper planes is the no. 112 (photo, above). It features a pair of nuts and a threaded rod that allow you to vary the pitch of the blade for the most effective cutting angle. Handles similar to a smoothing plane make it comfortable to use for long stretches. And the large sole offers support as you smooth wide surfaces.
High-angle plane
Most bevel-down bench planes have a bed angle of around 45° because it provides a happy medium between quality of cut and ease of use. Lower angles tend to tear out the wood grain, and higher angles require greater effort to push through the wood.

But for figured or difficult grain, a blade angle of 50° or 55° shears the surface of the wood without pulling out the grain (photo, above). Unless you work with a lot of highly figured wood, though, it's hard to justify the expense of both high-angle and standard-angle bench planes.
Lie-Nielsen and Veritas each offer a high-angle frog you can simply swap out for the standard frog in their bench planes (photo, above).

A low-angle, bevel-up plane achieves results similar to a high-angle plane (Drawing, above). This sounds counterintuitive, but on a bevel-up plane, you can alter the cutting angle by changing the bevel angle on the plane iron. Instead of grinding a new angle on your blade, purchase a second blade with a higher angle to use when you encounter a board with temperamental grain.