Three great finishes (that aren't polyurethane)
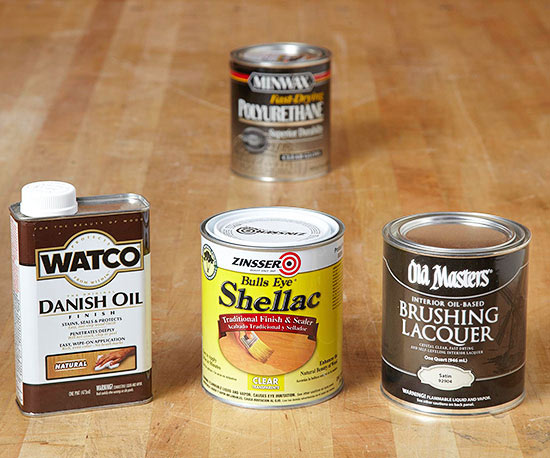

Many woodworkers choose polyurethane as a go-to finish simply for its familiarity. Easy to apply, it looks good on a variety of woods and provides plenty of protection. But poly may not always be the best choice. Consider one of these three other clear finishes for your next project. You'll be glad you did.
Danish oil: Smooth and easy
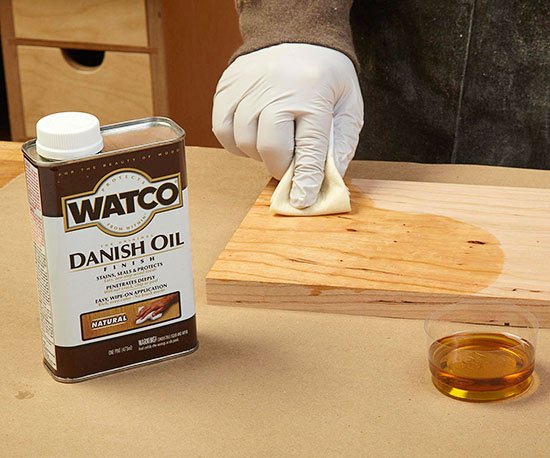
When it comes to bringing out the natural beauty of a highly figured piece of wood, such as quilted maple or quartersawn oak, nothing beats a hand-rubbed Danish-oil finish. Typically a Danish oil consists of a mixture of tung oil and varnish. It penetrates into the wood, unlike a film finish, which sits on the surface. That penetration gives a depth to the wood's grain that's hard to achieve with a film finish.
Applying Danish oil is simple -- you dip a cloth in the finish, then use it to flood the wood's surface, photo below Let it soak in for 15 minutes, and work more into areas that absorb the oil. These spots will appear dull. Then, wipe off any excess because "puddles" dry tacky. This "bleedback" occurs particularly in open-grained woods, such as red oak.
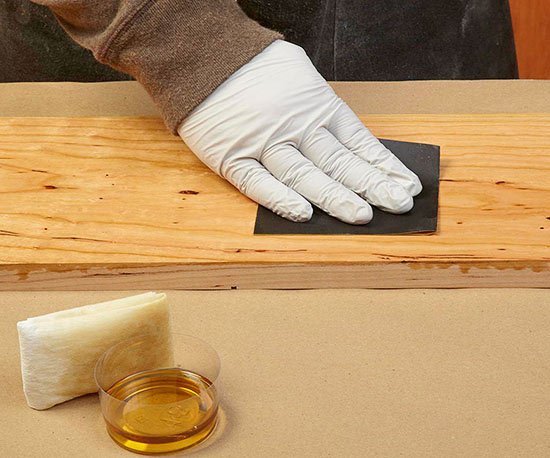
Make it satin smooth
Danish oil dries slowly, so wait overnight before recoating. And it goes on thin, so apply a minimum of three coats. You don't have to worry about brush marks, but you'll get an even smoother finish by lightly "wet" sanding between the second and third coats. Use 600-grit wet-dry sandpaper and the Danish oil as a lubricant, photo below. Any fine dust wipes off with the excess oil. Wiping on a final coat adds to the luster.
Clean up any spills with mineral spirits and hang application rags unfolded over the edge of a trash can, or laid out flat on your shop floor. Danish oil generates heat as it dries, and a wadded-up rag can spontaneously combust.
Because Danish oil doesn't build like a film finish, stick with poly or choose lacquer (discussed later) for surfaces that may be exposed to liquids, wear, or abrasion. Should a Danish finish suffer damage, reapply some oil with a little wet sanding to restore its original luster.
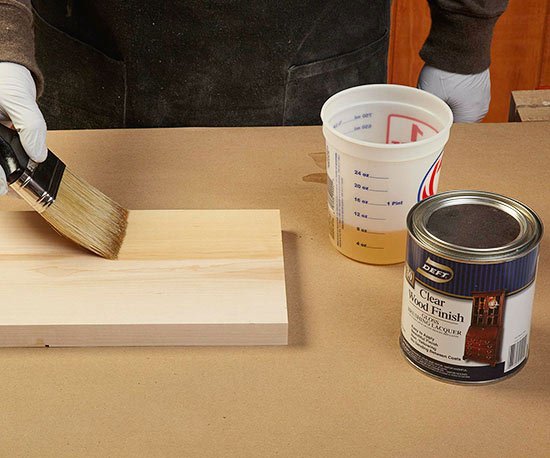
Lacquer: Fast and fine
Furniture manufacturers use lacquer on mass-production assembly lines for a reason. It sprays nicely, imparts a warm glow, goes on smooth and level, dries quickly, and builds fast. This tough finish also polishes to a high shine and repairs easily. Lacquer also works well on most types of wood, except for oily exotics.
Lacquer comes in several types, with nitrocellulose the most common. Nitrocellulose dissolved in lacquer thinner provides a finish that deposits the cellulose fibers in a film as the thinner evaporates. Subsequent coats dissolve into the previous layer, so scratches repair easily with minor sanding and a touch-up coat.
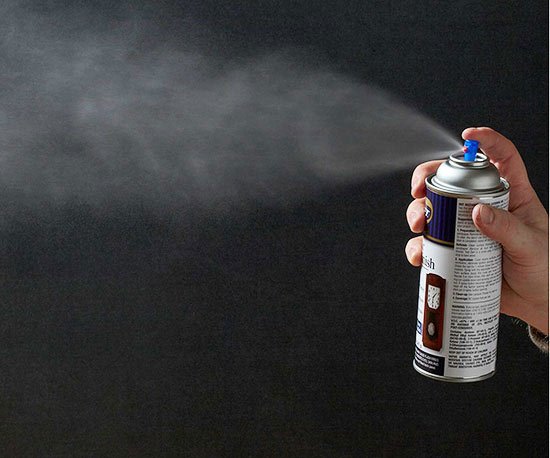
If you don't own a spray gun, aerosol cans, photo below, provide an economical spray option for all but large furniture projects. Spray lacquer dries within 30 minutes, so you don't need to wait long to apply additional coats.
Brush it on
Brushable formulas, with recoat times of about an hour, give good results as well, though you need to work quickly to maintain a wet edge and avoid brush marks, photo below. Because of the strong solvents, apply lacquer with a high-quality natural-bristle brush in a well-ventilated workspace.
Four to six coats create a thick film finish. You don't need to sand between coats unless you have brush marks. If so, sand the surface lightly with 600-grit paper and apply a thinned (three parts finish, one part thinner) final coat or two to help eliminate brush marks. Once the finish fully cures, it can be buffed to a high sheen with #0000 steel wool and mineral oil.
Avoid applying lacquer on humid days. As the solvent evaporates, moisture condenses on the cooling surface to form a whitish film known as "blush." Clean up brushes or overspray with lacquer thinner.
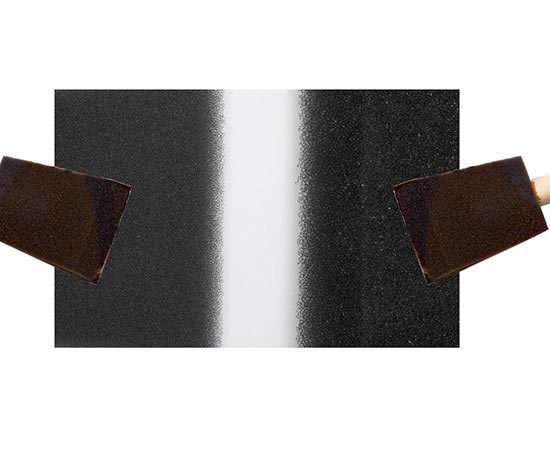
Not all foam is created equal
Price usually indicates the difference between a quality bristle brush and a cheap one, but aren't those disposable foam brushes all the same? We thought so too, until we ran across these two examples. As you can see in this closeup of the edges, the brush on the right has much larger pores that leave a ragged edge and could even shed. The brush on the left, made with a finer-celled foam, will lay down a smoother finish. The kicker is that the brush on the right actually cost us more!
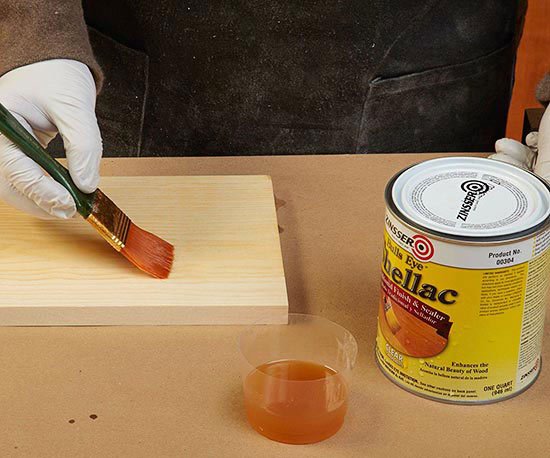
Shellac: The natural choice
This traditional finish comes from natural resins secreted by the lac bug. These secretions are collected and processed into flakes that dissolve in ethyl or denatured alcohol. You can also buy shellac premixed, it's slightly cheaper than polyurethane. Shellac flakes come in various colors, ranging from orange/amber to light yellow (super blonde), which lends a warm tone to the wood. A natural, nontoxic resin, shellac comes in a food-grade formula used to coat many of the candies you snack on.
Shellac makes a great sealer for all types of wood, including resinous pine and oily exotics that can pose bonding problems for other finishes. And you can top shellac with another finish, such as poly. Although durable, shellac doesn't stand up well to heat or alcohol. But it can be polished to a high gloss to enhance the depth of the wood's grain.
Apply shellac with a high-quality natural or synthetic brush, photo below. Foam brushes can be used on smaller pieces. (See Not all foam is created equal, previous slide.) If you find that you're leaving brush marks, thin the shellac with alcohol. But realize it will take more coats to build a suitable finish. As with lacquer, don't apply shellac on humid days to avoid problems with blushing.
Mixing your own shellac, using flakes, offers a couple of advantages. First, you're assured the finish is fresh. Once mixed, shellac has a limited shelf life—after a year it won't fully cure—so you can whip up only the amount you need for a particular project and know the finish will cure properly.Second, you can experiment with how thick or thin you make it. (See Understanding "cut," below.) Several thinner coats typically produce better results than a couple of thick coats.
Level out the finish using sandpaper backed with a hardwood block. Change sheets often, as shellac will quickly clog sandpaper. For a glossier finish, buff out the shellac with #0000 steel wool and mineral oil, proceed to dry rottenstone with a soft cloth, then top with a coat of hand-rubbed wax.
To clean up brushes, rinse out the excess shellac with denatured alcohol, then wash them in a 50/50 mixture of hot water and household ammonia.
Understanding "cut"
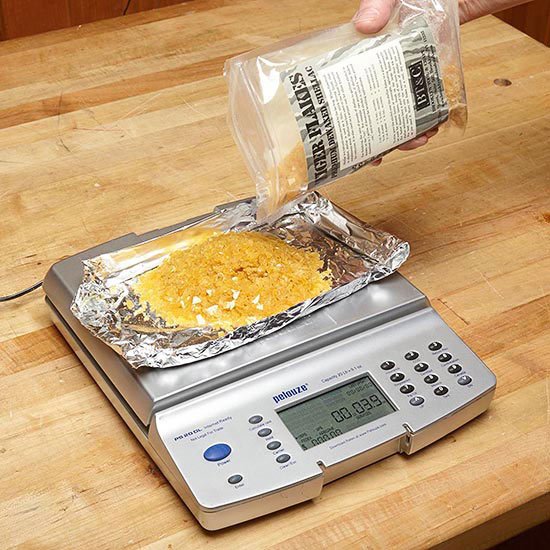
The term "cut" refers to the number of pounds of shellac flakes mixed into one gallon of alcohol, so a two-lb cut has two lbs of flakes in a gallon of alcohol. To make a pint of 2-lb-cut shellac, you need to do a little math. There are 32 ounces in 2 lbs, and 8 pints in a gallon, so 32 divided by 8 equals 4 ounces of flakes.
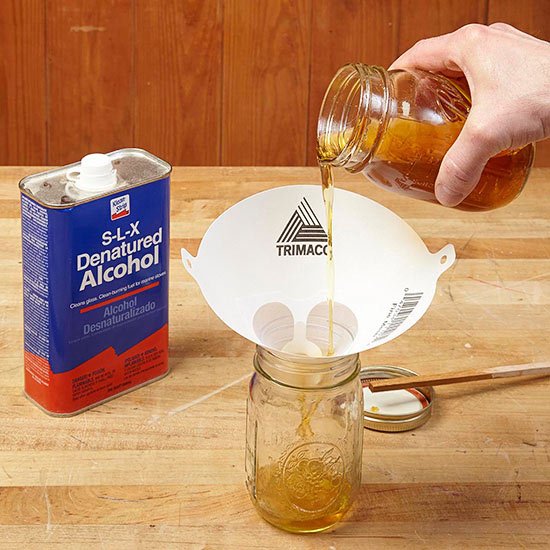
To mix your own shellac, pour a measured amount of denatured alcohol into a glass or plastic container. Weigh the proper amount of shellac flakes. (You can find inexpensive scales at office-supply stores.) The finer the flakes, the easier they dissolve, so crush the flakes in a clean cloth before adding them. Placing the container in a pan of hot water also helps speed the process. Once the flakes dissolve, use a paint filter—available at paint stores or home centers—to strain the liquid into a clean glass jar. Label the jar lid with the cut information, color, and date it was mixed.
More Resources
- Find free articles on a variety of finishing techniques at woodmagazine.com/finishing.
- Find a free article on applying traditional shellac finish with a pad at woodmagazine.com/shellac.
- Learn how to choose the right brush for each type of finish and make it last at woodmagazine.com/brushwithgreatness.