Built-ins That Blend In

Part furniture, part trim carpentry, built-in cabinets require that you fit square projects into an unsquare world where walls bulge, floors tilt, and ceilings slope. We shadowed two experienced makers and installers of custom cabinetry to bring you simple tips and tricks that will keep your built-in projects (and your sanity) "on the bubble."
Before you build
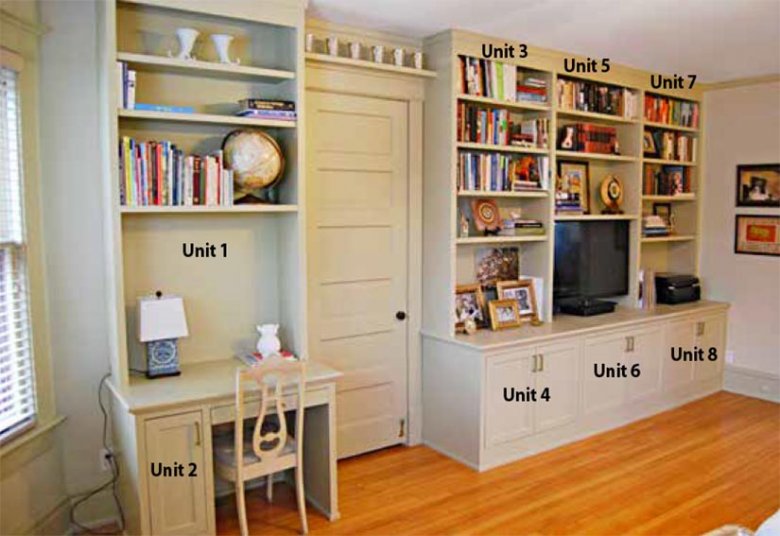
The design possibilities for built-ins are endless—from bookcases in the den, to a living-room entertainment center, to a set of kitchen cabinets. But even if you know the approximate shape and style of your project, you need to thoroughly survey the built-in's future home before you touch blade to wood in the shop to ensure a perfect fit.
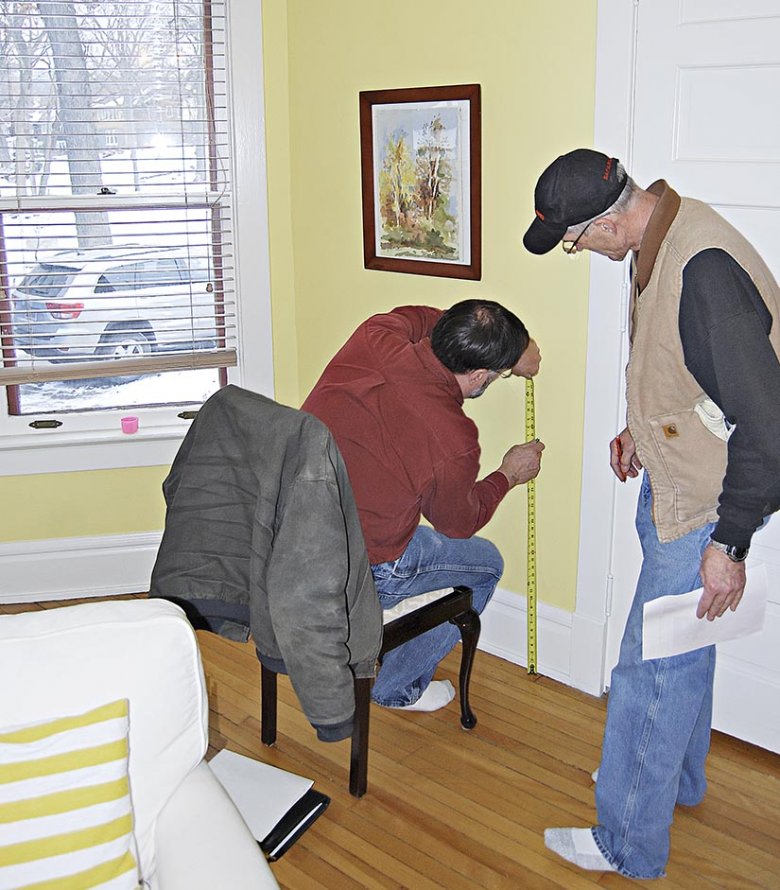
For the initial site survey, you need only a tape measure, pencil, and paper. Your built-in must be designed within the constraints of its location, so your first priority is thoroughly documenting the "critical dimensions"—those inflexible measurements that dictate the shape of the project. In most cases, that means knowing the minimum (narrowest, shortest, shallowest) dimensions. Even the best-built homes are rarely square, level, and plumb to the tolerances you might be used to in woodworking, so take measurements at multiple spots: A wall could present the same measurement at the ceiling and floor level but bulge in the center, surprising you with a narrower-than-expected critical dimension.
Critical dimensions include the locations of windows, outlets, vents, sinks, appliances, and other obstacles. But they can also include design standards for desk, seating, and countertop heights, says Nelson Hawbaker, below, owner of Nelson Hawbaker Building of Dallas Center, Iowa.

The final critical dimensions are dictated by the overall space of the install location and the path to it from your shop. Although an 8' bookcase may fit through a 7' doorway on its side, it won't stand up under an 8' ceiling without punching a hole through the drywall.
When in doubt, Dave McGrath, owner of Fine Line Woodworks of Bondurant, Iowa (finelinecustomwood.com), makes cardboard mockups that approximate the proposed size and shape of the finished pieces. He then tests the delivery and installation using the mockups to ensure they fit through halls, stairways, tight corners, and doorways, as well as in the installation location itself, adjusting dimensions if necessary.
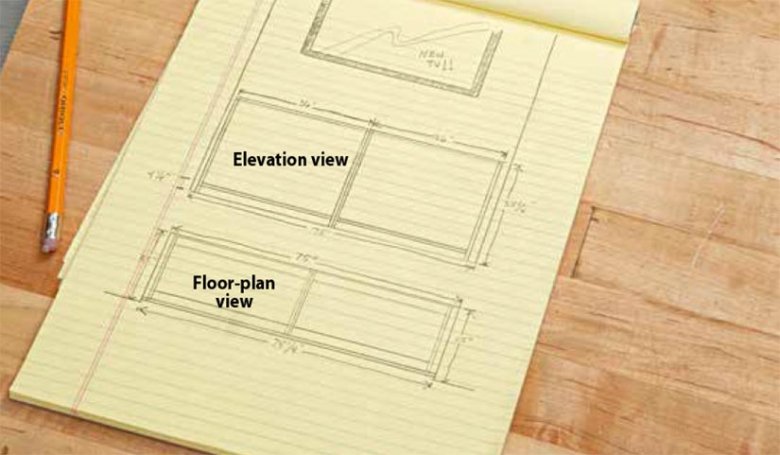
Write your critical dimensions on a sketch of the built-in's location. You should come away with an elevation (front-on) view sketch and a floor-plan (top-down) view sketch. Back in the shop, design and build the casework of your project to leave at least 1⁄4 " allowance between the project and walls. You'll use trim and tricks to fill the gaps after installation.
Level the base
Countertops, shelves, and worksurfaces must be level to prevent pencils or eggs from rolling off. This means finding a way to level the base of your built-in, even if the floor could qualify as a black-diamond ski slope.
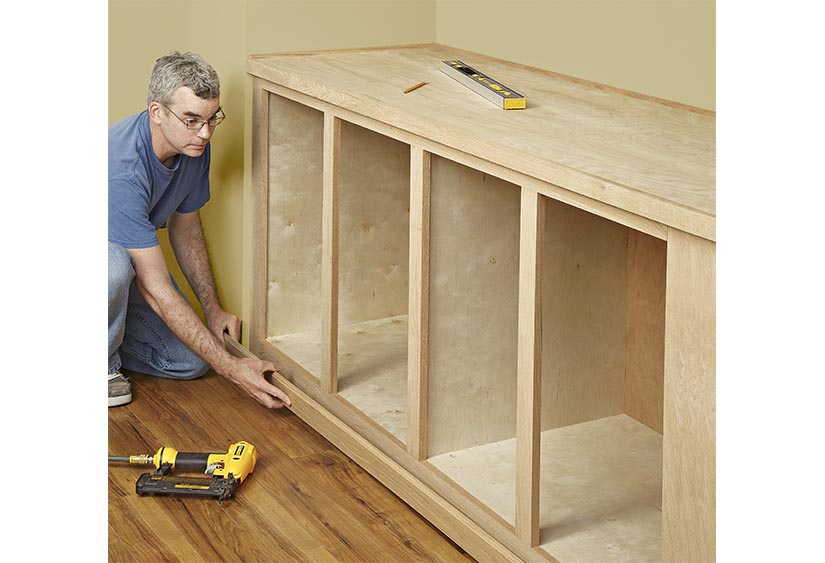
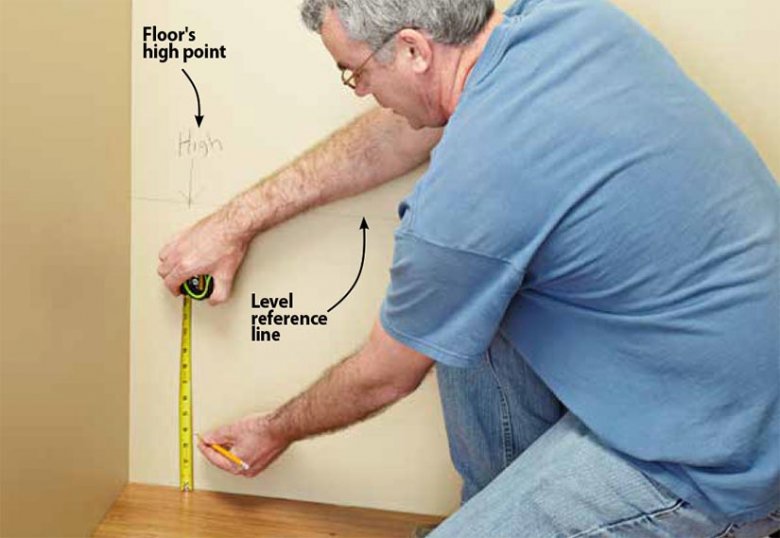
To get started, mark a level line about 18" off the floor on the rear wall where the built-ins will be installed. Measure from the floor to this line at various points along its length to find and mark the floor's highest point, below. This point now becomes the reference point at which to measure and mark other critical heights; for example, measure from the floor to countertop level at the high point and extend a level line across the wall to ensure the cabinet sits at the highest point possible.
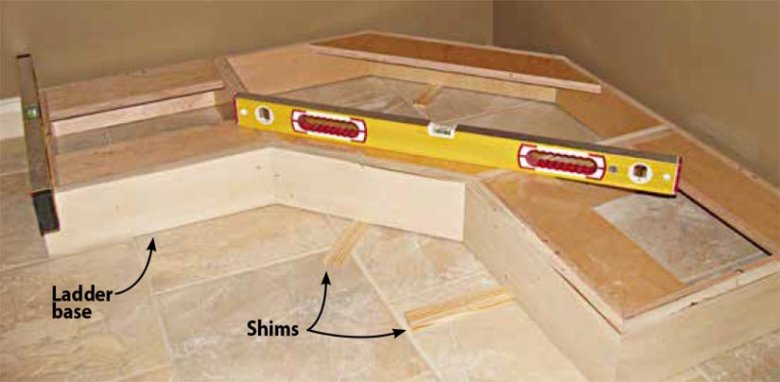
Armed with level reference lines, most pro cabinetmakers don't even rest built-ins on the floor, strictly speaking. Instead, they install a simple "ladder" base, below—a framework of plywood strips leveled with shims and secured to the wall—that will later be covered with trim.
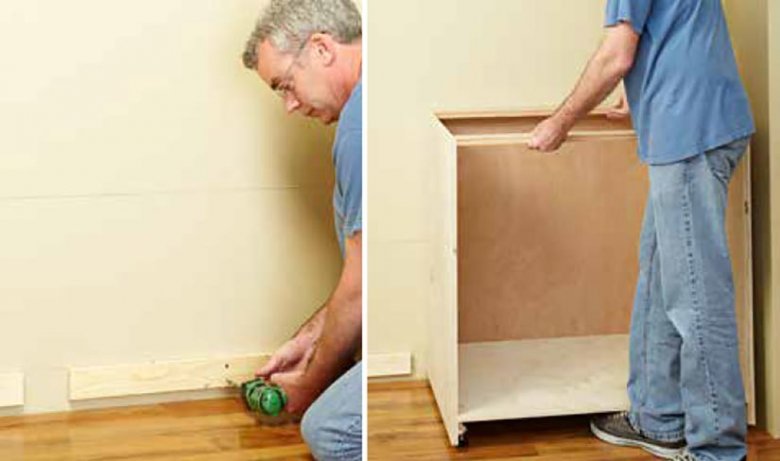
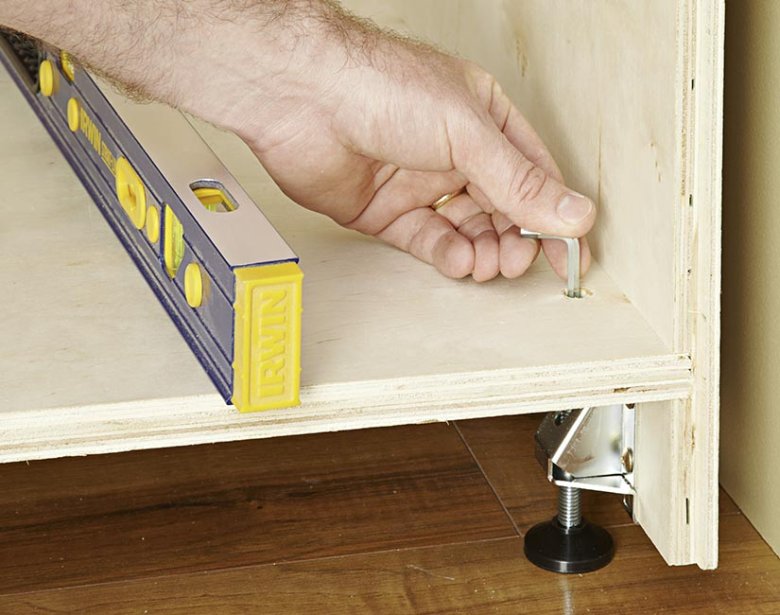
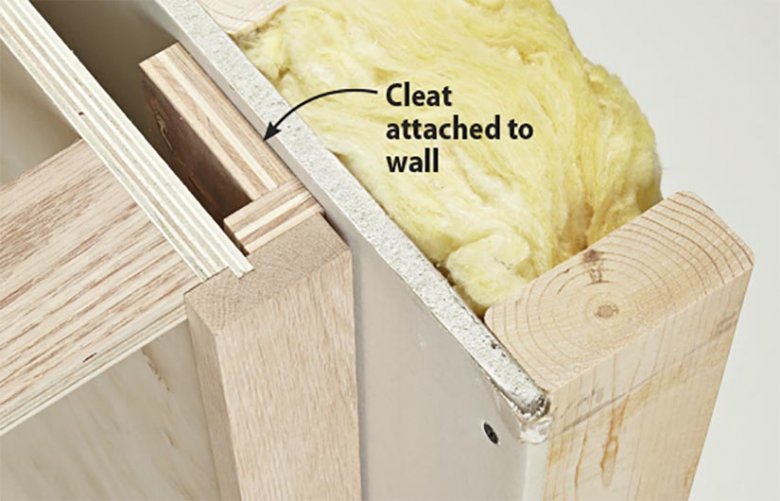
An easier but slightly spendier solution: Cleats, above, support the back of the cabinets while adjustable leveling feet, below, support and level the front. We ordered ours from Woodcraft Supply (item no. 145840, woodcraft.com, 800-225-1153).

You should now have a perfectly squared case that "floats" plumb and level surrounded by the out-of-plumb, not-square, and unlevel walls, floor, and ceiling of your house. Time to introduce them to each other.
Meeting the wall
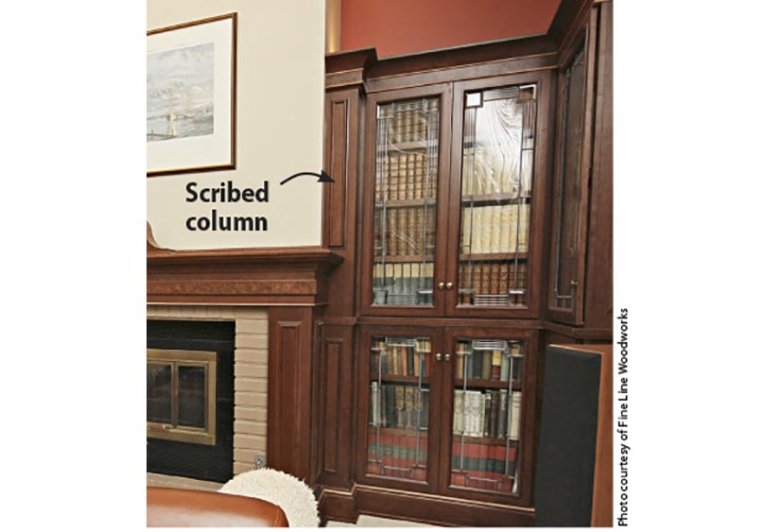
You hide most built-ins' sins with trim, says Dave. Where built-ins meet walls, cabinetmakers add "scribes." Any part of the built-in that meets a wall—such as stiles or trim—is designed with extra material to be shaped to fit the wall.
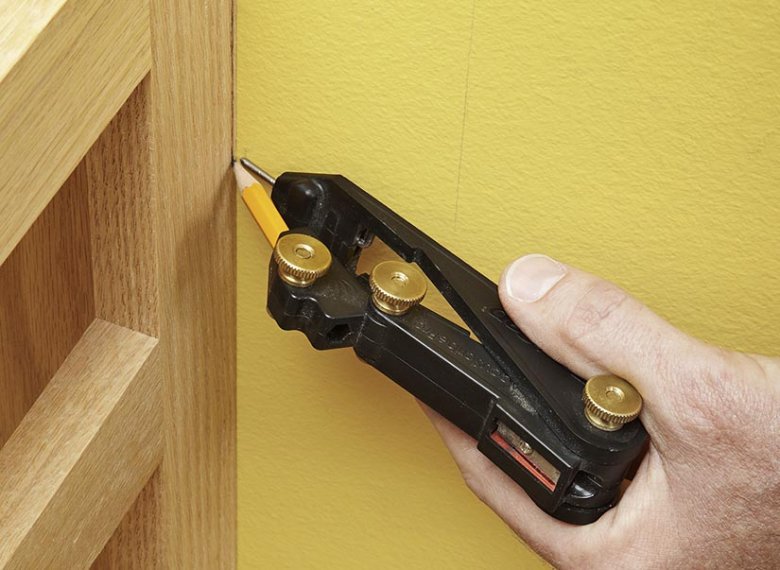
This requires tracing or "scribing" the contours of the wall onto the project part using either a specialty scribing tool such as the AccuScribe Pro, above, or a simple compass, below. Rabbet or bevel the hidden back side of the material. The reduced material thickness makes it easier to shape with a belt sander or block plane.
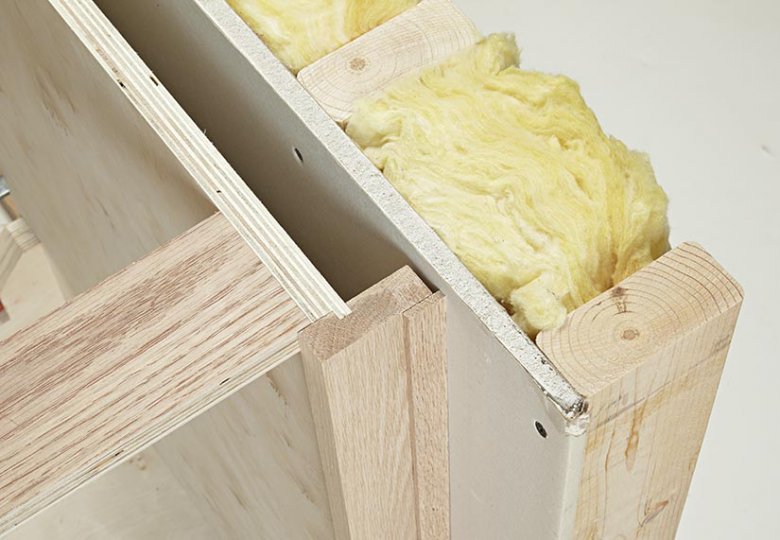
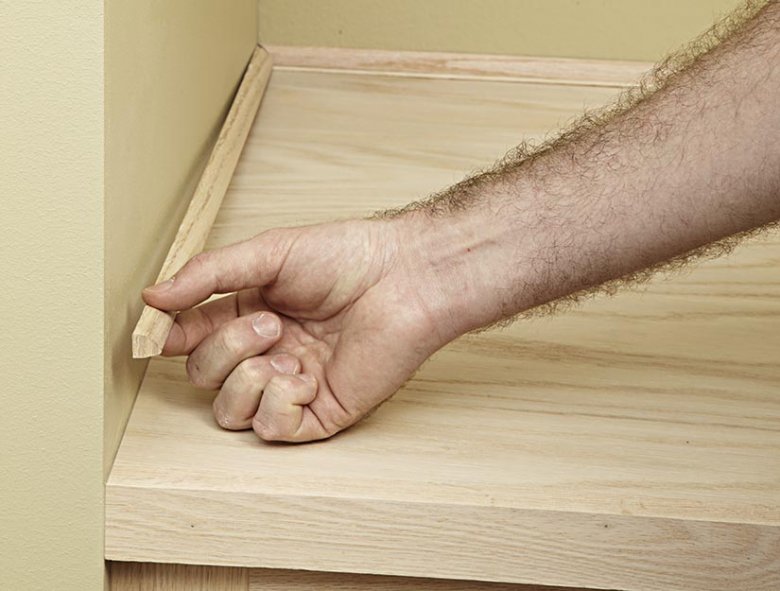
A small trim piece, below, conforms more readily to wall contours than the thick face frame, concealing gaps that broadcast imperfections.
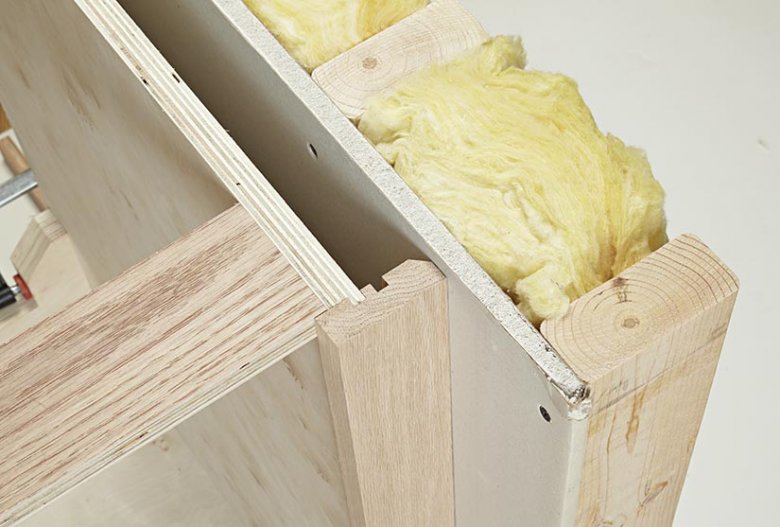
You can also minimize discrepancies between the built-in and a wall by transitioning with a reveal, below. Leaving a gap between the wall and face frame forces the eye to jump that gap, making it difficult to compare the two.
In instances where imperfections in the walls are extreme, or where cabinet installations are unusually large, it may be more convenient to build the wall out with trim to give the built-in a plumb installation location, below.
Countertops that fit contours
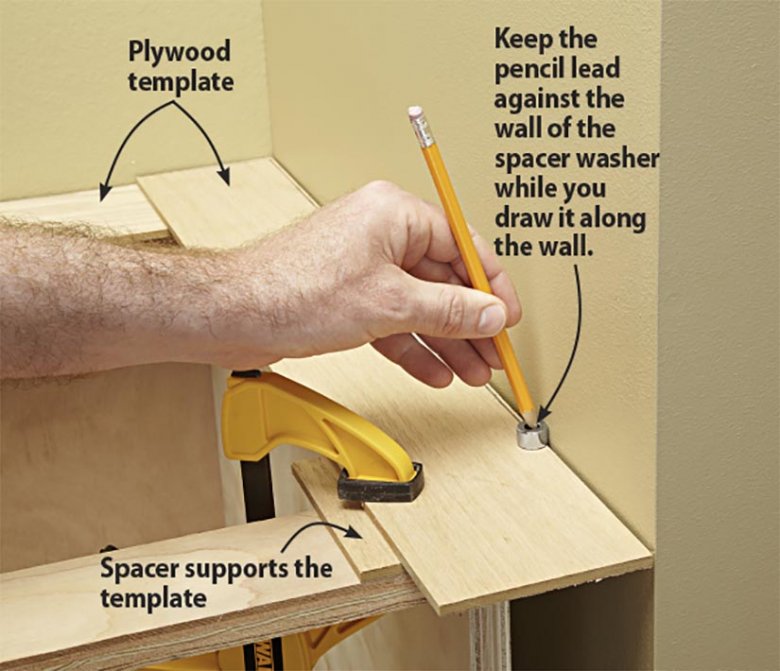
Countertops trapped between three walls present a unique challenge. Where two sheets of drywall meet in an inside corner, drywallers layer joint compound to hide the seam. This virtually guarantees a tapered, out-of-square corner, even on even the most exacting framed construction.
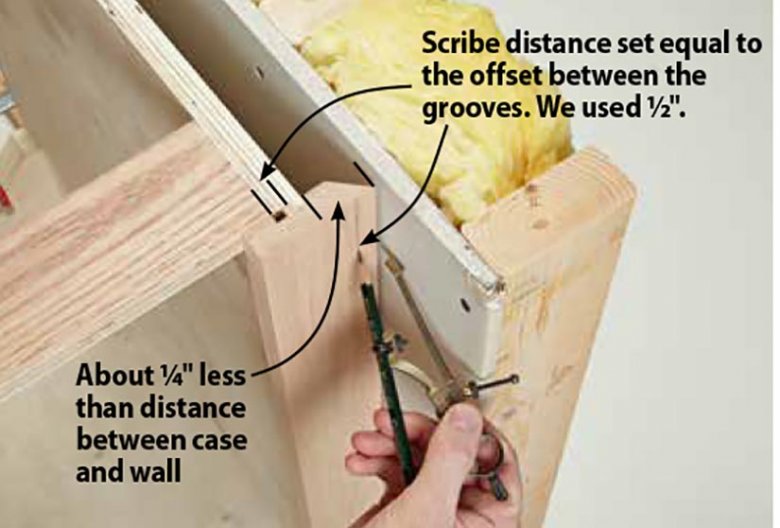
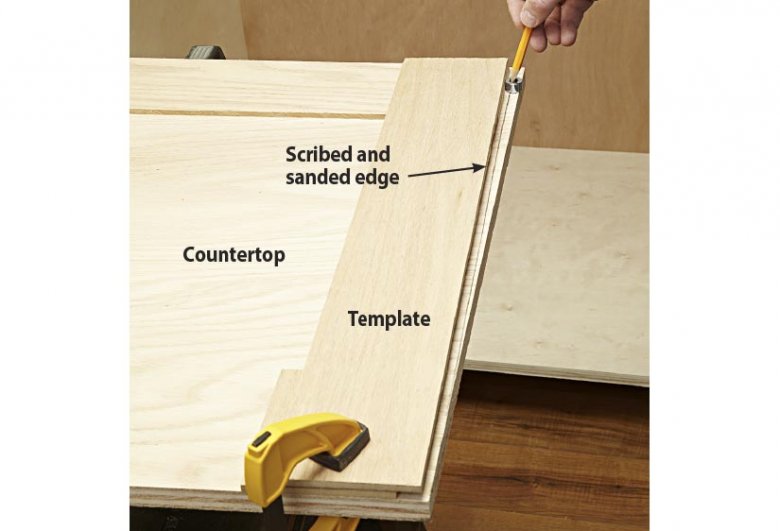
For walls that are nearly square—especially those that form openings narrower at the rear than the front—create a template for scribing from scraps of thin plywood, as shown below.
For countertops surrounded by walls with more severe aberrations, you will often have no choice but to leave a gap. That's when trim comes to the rescue, below.
Don't look down!
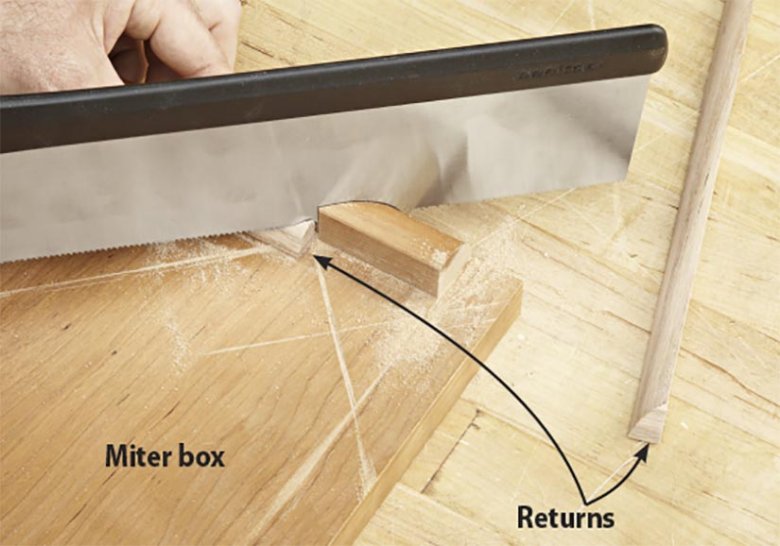
The last bit of blending to do: floors and ceilings. "Nobody looks down," says Dave. They just don't bend over to check baseboards and toe kicks. But they do look up. So while you can fudge the base—slightly angling trim to average out out-of-level floors—you'll have to be more creative where the top transitions into an out-of-level ceiling.
Dave employs eye-tricking transitions. Multiple layers of trim, below, alternating colors, and shadow-line reveals all create transitions that draw the eye rather than highlighting the discrepancies between case and ceiling.
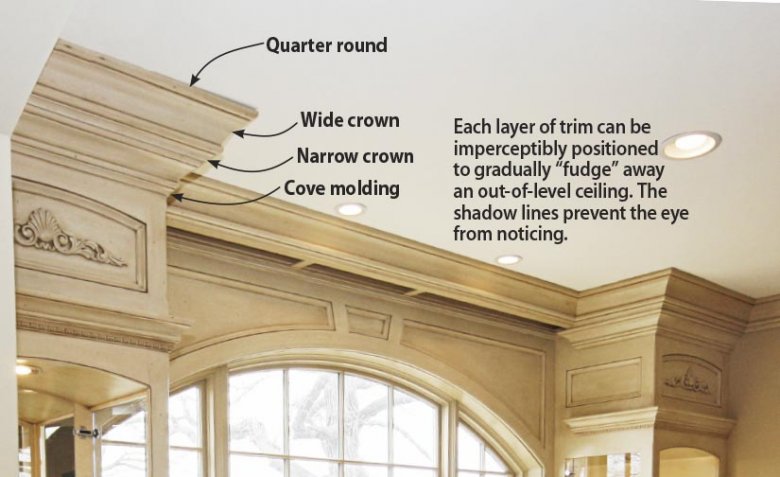
In extreme cases, where the ceiling slopes dramatically, design the built-in with a dead space between the case and ceiling. The eye has difficulty comparing level lines when they're crowned with trim that doesn't touch the ceiling.